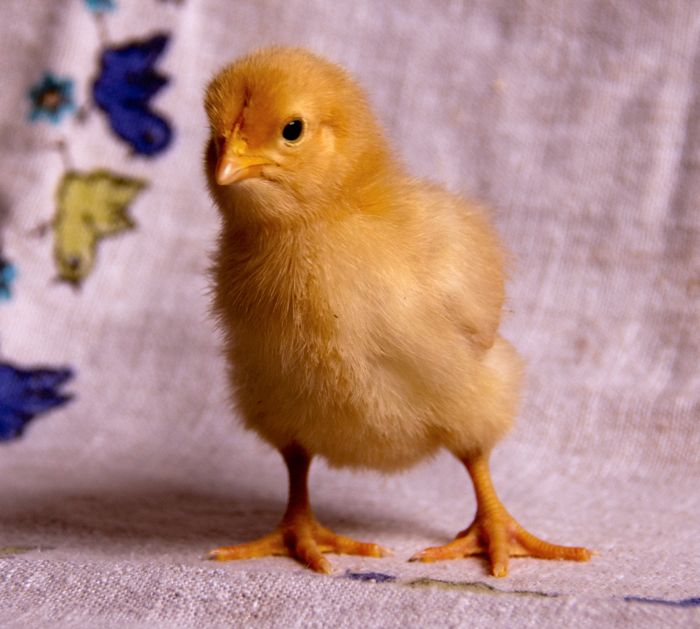
Those tiny, peeping chicks that you bring home from the feed store or post office are ridiculously adorable and are obviously babies. They will require special care for the first four months of their lives. Have their housing ready for them. It’s likely that they’ve traveled to get to you, and they’ll need water, food and heat as soon as they arrive home. Chicks need to stay warm; their fluffy coats don’t insulate them like their adult feathers will, and so they have to live in a brooder, which will keep them safe and the right temperature as they mature.
As cute as they are, do not be tempted to keep the chicks in your kitchen, or for that matter, anywhere in your house. First of all, they grow rapidly, and they will soon be too big for whatever box you thought would be adequate. Secondly, and most important, is that chicks make a mess. They poop – a lot – and they scratch their manure into a fine dust. That mixes with the sticky keratin that they shed as they lose their down and unfurl feathers. All of that will coat every surface in your house, and you’ll be breathing it in. So, plan ahead and have a place in the barn, the coop, the garage, or your basement, but not in your own living areas. While on this topic – don’t kiss the chicks. Poultry naturally carry bacteria, including salmonella, in their guts. You’ll stay safe if you wash your hands after handling your birds. You run a risk of getting seriously ill if you put your mouth to their bodies. I’ve written more about chickens and human diseases here. For more about handling chicks, read this.
Chicks have a few basic requirements. They need to stay warm. They need food and water. They need to be able to scratch the ground with their feet. They need enough space so that they aren’t stressed. I also firmly believe that a major factor in raising healthy hens from chicks is usually overlooked. Chicks are curious, busy, and social beings. A typical brooder, which is basically a heat lamp, bedding, food and water is too boring for them. The very first week that they arrive, I set up an enriched environment. I give them interesting things to do so that pecking each other doesn’t become a pastime. I’ll get into that later in this article.
The Brooder
I’ve found that the easiest way to construct a brooder is to get a big cardboard carton, like one that a washing machine comes in. Or, you can tape together sturdy packing boxes. The thick high sides will keep out drafts. A hanging heat lamp provides warmth. Because chicks have a crowd mentality, and because even those fluffy sweet-looking babies peck and chase, block off the corners so that no one gets trapped and pounded on or smothered.
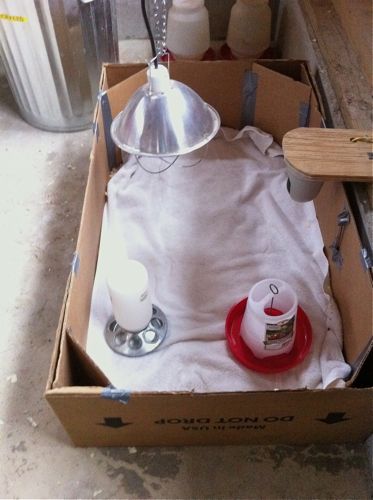
This is inexpensive, temporary housing.
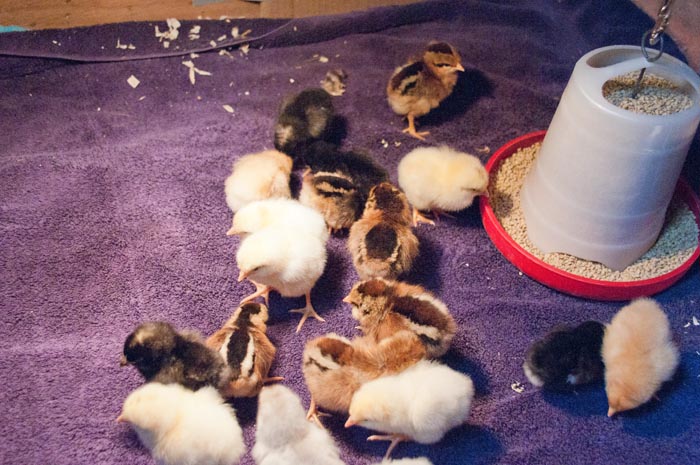
When the chicks arrive, keeping them warm is key. The temperature should be 95º F. But, I don’t use a thermometer. The chicks tell me if they’re comfortable. The heat lamp is on a cord that can be raised to regulate the temperature. Notice that the brooder is big enough that the chicks can get away from the heat if they want to. If they’re peeping loudly and crowded under the heat lamp, then they’re cold.
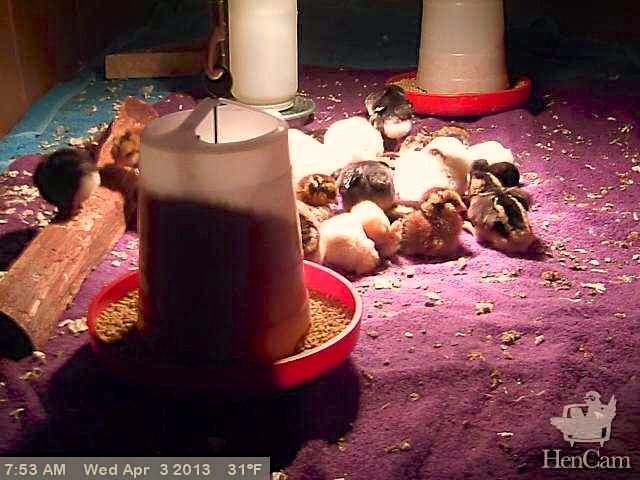
If they’re in the shadows, away from the light, they’re too hot.
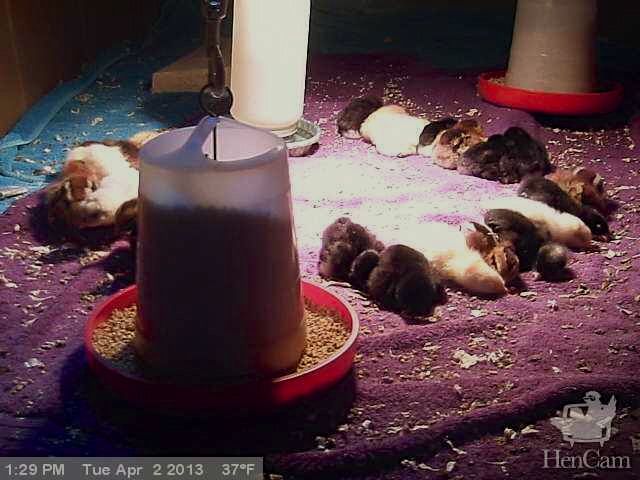
If they’re evenly spaced, and either active or dozing here and there, then it’s just right.
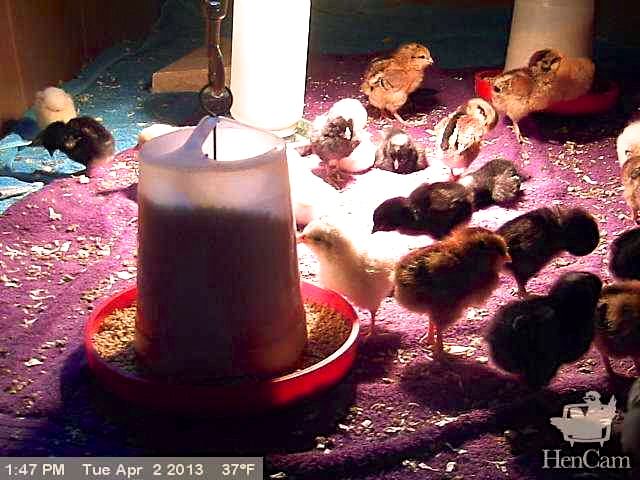
Every few days they require a few degrees less warmth, and so I raise up the lamp. Because my chicks are kept in an outbuilding that isn’t heated, I adjust the lamp during the day as the outside temperature fluctuates. This is a basic heat lamp. One of these days I’ll try the new radiant brooder. But this one works, and so I haven’t felt the need to spend the money.
Feeding Chicks
When chicks hatch, they still have some yolk remaining inside of them. This provides them with nutrients and water for the first few days of life, which is why chicks can be shipped in boxes through the mail. As soon as they arrive home they need to be fed and watered. Gently hold each chick and dip her beak in the water. If she gets a bit on her beak, she’ll swallow and that’s all it takes to teach her where the water is. Use a waterer designed for chicks, as the little ones can drown in a dish.
The bulk of a chick’s diet should come from commercial feed formulated specifically for them. Chick feed differs from laying hen ration in several important ways. First of all, it is in the form of crumbles, which, being smaller, is easier for chicks to peck and swallow. Secondly, chick feed is higher in protein, around 18% versus 14 to 16% in laying hen pellets. Lastly, and of the greatest importance, chick feed is low in calcium. Mature birds eat laying hen pellets formulated with calcium because that mineral is necessary to create eggs. What’s good for layers is not good for chicks. Chicks fed a ration with calcium will develop kidney disease. Chick feed comes plain or medicated. Although chicks in large production facilities are often fed sub-therapeautic antibiotics, the bags of feed sold to backyard keepers don’t have those drugs in them. Rather, the “medication” refers to a drug that kills a lethal protozoa called coccidia. Not all backyards harbor coccidia, but if yours does, the chicks might get bloody diarrhea and die. Some people wait until there is a sign of the ailment before treating the flock with a coccidiostat. Other chicken keepers routinely offer a medicated ration as a preventative measure. Some, like myself, get chicks vaccinated for coccidia. If your chicks are vaccinated for coccidia, then you cannot use medicated feed. (This is for the coccidia vaccine. If your chicks are vaccinated only for Marek’s disease, you can feed a coccidiostat.)
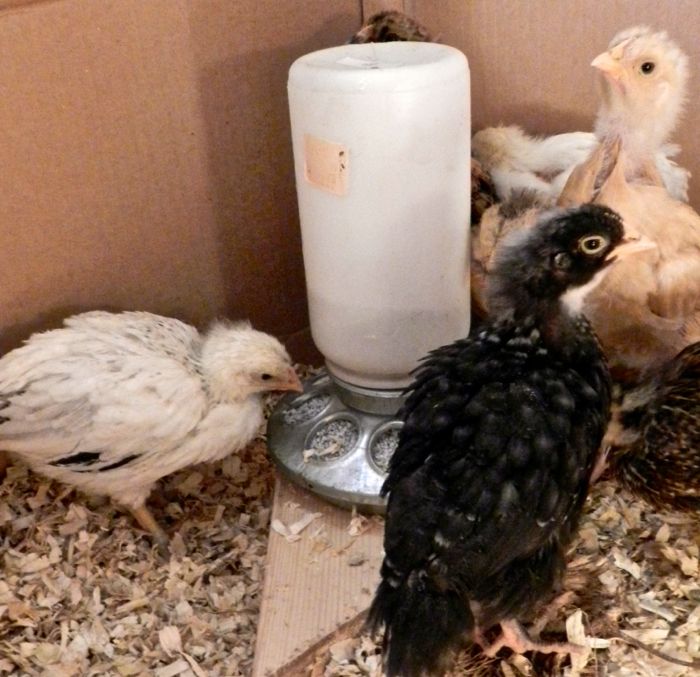
It’s best to provide the crumbles in a dispenser made for this purpose. If possible, use a hanging feeder. This keeps the chicks from standing and pooping in their ration.
Feed your young birds a starter ration until they reach point of lay, about sixteen to eighteen weeks of age. At that point they will do better on a lower protein ration, and their systems can handle the calcium. Do not feed chicks that are destined to be laying hens a “finish ration” or a “show and grow.” These products are designed for meat birds, and put weight on fast. Not only is the protein and fat content wrong for layers, but a few companies do put antibiotics into them.
Keeping Chicks Busy
Within a day of hatching, a chick is ready to search for food, to explore, and to interact with others. Unfortunately, a typical brooder is a boring place. There’s nothing to peck at except for uninteresting crumbles and the other chicks. In a perfect world, the chicks would be able to go outside and scratch up bugs in the dirt, eat greens in the yard, and try little bits of this and that. But, the weather often doesn’t cooperate. Chicks will grow okay if fed only crumbles. But, from the get go they’re omnivores, and a varied diet will do them good. That doesn’t mean that you should give them piles of treats. Chicks are designed to eat continuously, and they are gluttons! Give them an easy to chow down on food and they’ll overeat; depending on what you feed, it could be like letting a toddler eat only Lucky Charms cereal.
You might have read that you can chop up vegetables and bread into fine bits and feed it as treats to your chicks. I disagree. Chicks don’t need their treats minced. By day four a chick can swallow a whole worm with no problem (and digest it easily thanks to grit.) I want the treats that I feed my chicks to take time and effort to consume. Also, the treats must be nutritious. Chicks require a higher protein content than adult hens. Bread and corn won’t provide that. On the other hand, don’t feed dried mealworms, as a few too many can lead to kidney disease.
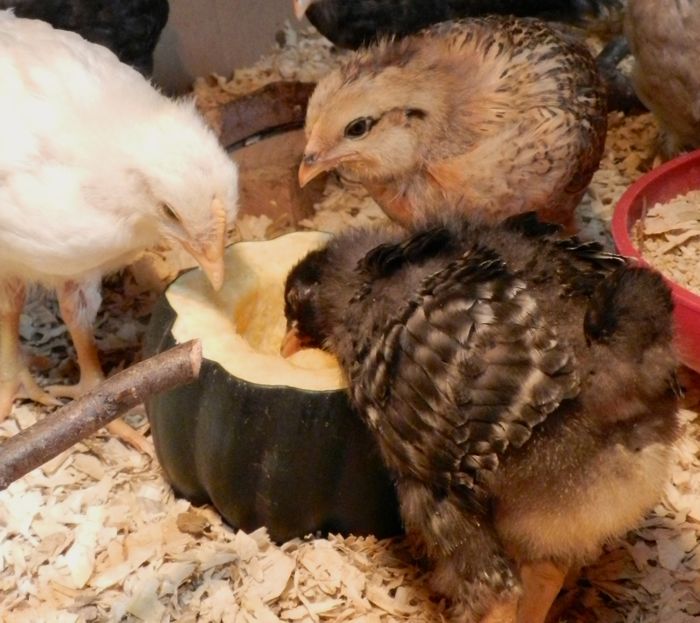
The first week I give the chicks a small clod of dirt with a clump of clover or dandelion attached.
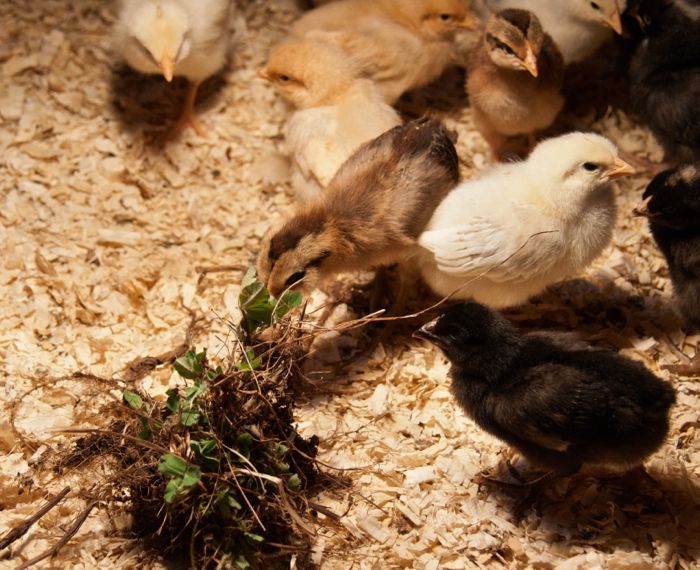
This is better than grass, which has long blades that can get impacted in the crop. The chicks peck and eat bits of green and they even find bugs to eat. You might see a chase and tug of war when a worm has been found. They’ll scratch at the dirt. Scratching is another innate behavior that chicks are preprogrammed to do. Giving them an outlet for this is important to their well-being. You’ll hear much excited and happy chirping. If nothing is growing, or just for a change, give them a vegetable to work at. They’ll peck at it and not at each other. Win-win!
As the chicks get older, you can give them a clod with short blades of grass attached. An added benefit is that once the greens and the bugs are eaten up, there will be dirt for them to take a dirt bath in. Your chicks will know how to do that their first week, too!
Grit and Probiotics
Along with providing food and water, there are two other things to offer your chicks that will greatly improve their vitality: grit and probiotics. Chickens, like all birds, do not have teeth. They don’t chew. Rather, they swallow food whole. Their digestive tracts are designed to deal with this. Specifically, a chicken has a gizzard, which is an exceptionally strong muscular pouch that grinds up food. The gizzard does this with the help of small rocks that the chicken swallows. Even if your hens free-range, it’s unlikely that they can find just the right pebbles for their gizzard. Certainly chicks, in a cleanly bedded brooder, don’t have access to what their gizzards need to function properly. That’s why they need you to provide grit.
You can buy a bag of grit at the feed store or online. Basically, it’s ground up granite. Chick grit is finer than chicken grit. It might seem crazy to spend $10 on a bag of pebbles, but it is essential to the health of your new flock. This is not a new idea. I have a catalog from 1919 that offers bags of chick grit for sale. Give the chicks a couple of days to eat their crumbles before introducing grit. Then, set out a dispenser filled with the grit. The chicks know what they need and will eat the right amount. In their first two weeks, 26 chicks consumed all of the grit in this container!
The other supplement that I provide my chicks are probiotics. Everyone’s intestinal tract has both good and bad bacteria in residence. When the balance is off animals don’t thrive and can sicken. You can provide your chicks with the right microorganisms by adding a product like Gro2Max to the drinking water. I do this for the first two weeks to give them a good start.
Roosts for Chicks
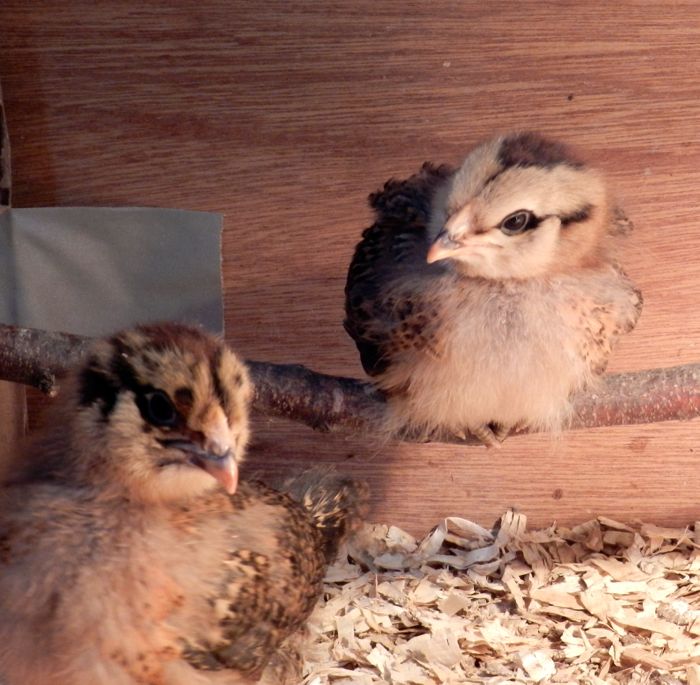
Vegetables and dirt clods will keep your chicks busy, but it won’t take care of all of their active energy. By the second week, chicks will be looking to perch. Provide them with small roosts. I make them out of branches nailed to 2 x 4 blocks. Soon you’ll see your chicks jumping up, finding friends to roost next to, and taking naps in their favorite spots. This primes them for good roosting behavior when they are adults.
Cleaning the Brooder
For the first day or two, the floor of the coop should be covered with a surface that is easy for the chicks to walk on and that they can’t eat. I use old towels. Newspaper is too slippery. Paper towels will do. Once the chicks know to eat the crumbles, switch to an absorbent bedding, like pine shavings.
Keep the manure picked out as best you can (I use a kitty litter scoop) but soon enough, the chicks will have shredded it to a fine dust. Shovel it out and replace. Keeping the air fresh and clean is essential for your flock’s respiratory health.
Going Outside!
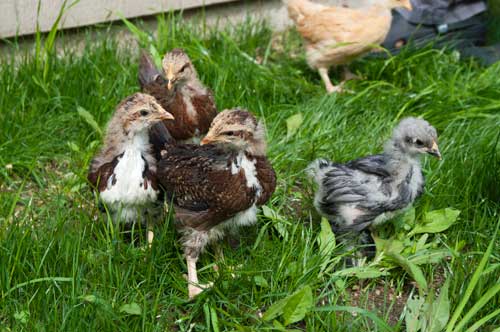
As long as the weather is warm and dry, your chicks can go outside for daytime playtime. Do keep an eye on them, as everyone from cats to hawks find chicks irresistible. Make sure that they have water and food. If it is sunny, have a spot of shade for them. One reason why I like to have the brooder inside of the coop is that the transition to going outside becomes seamless. By the time they’re two months old, they’re able to go in and out at will (into my safely fenced pen.)
The Chicks Grow Fast
That fluff-ball stage lasts all of 4 days. In no time at all they lose their down and get long, hard outer feathers. They get tall and leggy, stretch their wings and legs and act like mini-pteryodactyls. So, while you’re enjoying the chicks, keep in mind that they soon need their adult housing. I’ve written a FAQ about the criteria for a good coop here. You’ll need that coop sooner than you think!