Chocolate Chip Cookie Pie

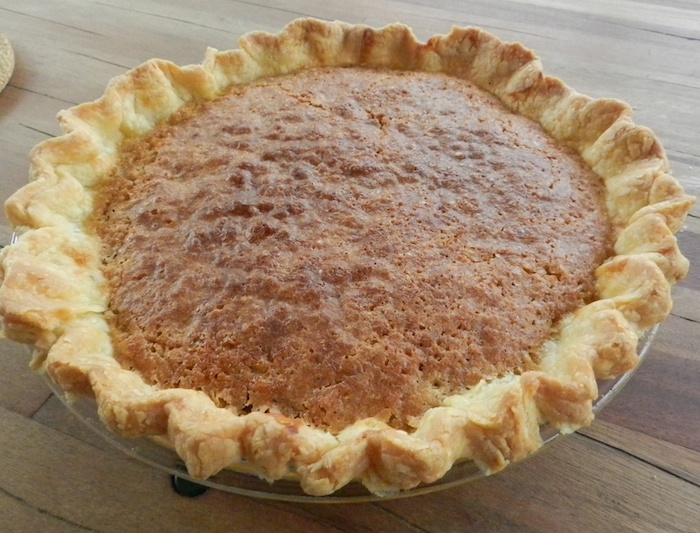
Have you ever seen those huge cookies at the mall? That greetings are written on? Take that idea, but make it fatter and softer, and yummier (because of the better ingredients you’ll use at home) and put it into a piecrust. There are plenty of recipes for this dessert (sometime called Toll House Pie) floating around on the web. Over the years I’ve looked at, and tried, many of them. I have growing boys, and despite the varied and creative array of pies that I bake, this is their favorite. I’ve tweaked the amount of sugar and chocolate chips, and left out the nuts (which they don’t like) and have come up with this version. The recipe can be doubled, and it freezes well. If you don’t have teenage boys about, you might have enough to put aside for another day.

Chocolate Chip Cookie Pie

1                        piecrust for a 9-inch pie (see master recipe here)
1 1/2 sticks      unsalted butter (6 ounces), at room temperature
1/2 cup             white sugar
1/2 cup             brown sugar
2                        eggs
1/2 teaspoon  vanilla extract
1/2 cup             all-purpose flour
1 cup                chocolate chips

1. Put the piecrust into a 9-inch shallow pie plate (this is the regularly-sized plate, not a deep dish.) Set it into the freezer while preparing the pie filling (freezing helps to keep the pie crust from becoming soggy when baked.) Preheat the oven to 325 degrees F.

2. Beat the butter and sugars until fluffy. I use a stand mixer, but this can be done with a hand-held mixer, or even energetically by hand. Beat in the eggs and vanilla until smooth.

3. Beat in the flour until well-combined.

4. Stir in the chips. Do this by hand, or, if you have a stand mixer, on the lowest setting.

5. Spread the filling into the piecrust and place the pie on the center rack of the oven. After 45 minutes, check the pie. When done, it will feel springy in the center and the crust will be lightly browned. It might take up to one hour to bake, depending on the pie plate and your oven.

This is very good with vanilla ice cream.

DSCN6016

The Best Apple Pie

Forget what you might know about apple pie, those gloppy fillings that taste more of sugar than fruit. Forget the pies that taste like candied apples. The best apple pies have a balance of sweet to tart, they have a sharp fruit flavor that has you thinking of orchards and rain. The crust flakes and crumbles in your mouth and the apples somehow have bite and yet are soft. That’s a perfect apple pie. Here is how you make it:

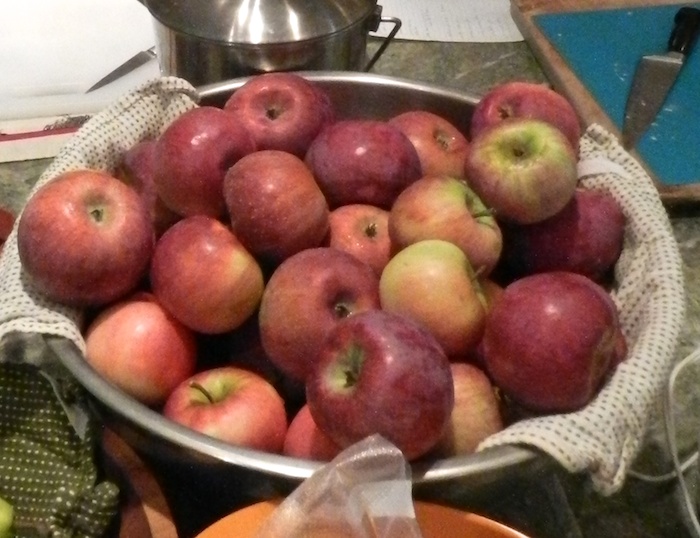
First of all, you need the right apples. Pass by the Delicious, the Braeburn and the Fuji. If the only baking apple options at your market are Romes and Cortlands, get those. Macintoshes add sweetness, but they turn to mush when baked, so use only a few. Better yet are the older varieties of apples, the Golden Russet, Northern Spy and Winesap. If you can, add a few Macouns to the mix. These apples have true apple flavor, not the one-note sweetness of the supermarket offerings.

Don’t worry if, after washing the apples, they all get jumbled up and you can’t tell them apart. Start with the right varieties and you can’t go wrong, no matter the proportions.

DSCN5112


You will need 8 cups of peeled, cored and sliced apples. The slices should be thin and uniform so that the filling cooks evenly and all the way through. The best way to do this is to use a nifty

which peels, cores and slices with the turning of a crank. You can read all about it in this post.

You will need a 9-inch deep pie plate, and two pie crusts, one for the bottom and one for the top. Use this recipe.

You will need sugar. You can use regular white granulated sugar, but the flavor is just one note. I prefer demerara or organic sugar which tastes more complex, but without the heavier molasses flavor of brown sugar.

You will need a thickener. Some use flour, but I think that gets gummy and tastes raw. You can use modified food starch, which yields a silky and clear filling. Or, you can use instant tapioca, which is readily available at markets. Don’t use too much, or the filling will be more like candy gone wrong more than a classic pie.

The Best Apple Pie

2 pie crusts, for top and bottom
1/2 cup sugar, preferably demerara or organic
1/2 teaspoon ground cinnamon
1 tablespoon fine, instant tapioca or 1 tablespoon clear gel (modified food starch)
8 cups peeled, cored and sliced apples
optional: 1 tablespoon maple sugar and/or 1 tablespoon minced crystalized ginger

1. Preheat the oven to 350 degrees F. Place the bottom crust in the pie plate and put in the freezer while prepping the rest of the ingredients. Filling a frozen crust keeps it from being soggy when baked.

2. In a small bowl, combine the sugar, cinnamon and tapioca. Mix evenly.

3. Stir the sugar mixture into the apples to coat.

4. Put the apples into the crust, mounding in the center. Drape the top crust over the apples.

5. Trim and flute the edges of the crust. Slice vents in the top.

6. You can put a cinnamon stick in the center if you wish. If you like a brown and glossy crust, brush with egg wash. For a soft crust, brush lightly with cream. You can dust with a bit of sugar. But, you don’t have to do any of these things and pie will still be lovely.

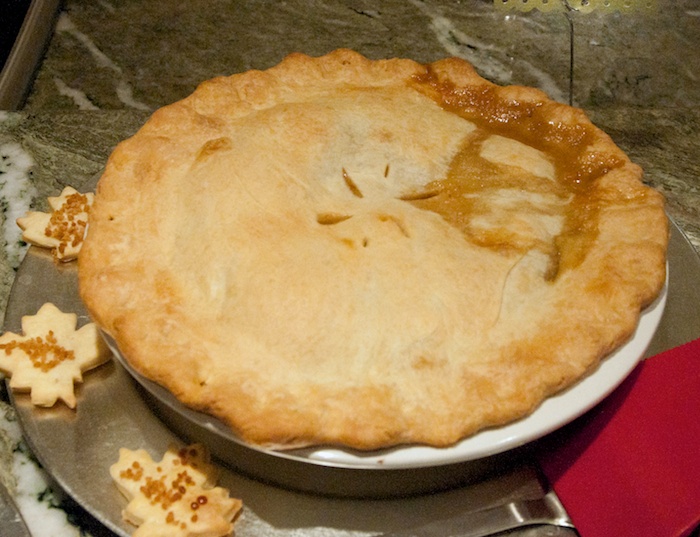
7. Bake for 45 minutes, or up to over an hour. Insert a sharp paring knife into a vent to test for doneness. It should slip right in without resistance. The length of baking time will depend on the freshness and moisture content of the apples.

Enjoy!!

_DSC5749


Perfect Pie Crust to Use or Freeze

I like to keep homemade crusts on hand. I never know when I’ll have the urge to make a tart or a quiche or a chocolate pie. So, over the years I’ve perfected an all-butter crust that I can use immediately or freeze. Here is how I do it:

There are four basic ingredients. Flour. (I use unbleached, all-purpose King Arthur flour. If you can find it, white pastry flour is even better and will make a softer crust.) Frozen unsalted butter. Kosher salt. Ice water.

Each 2-crust recipe uses: 2 cups of flour, 1/2 teaspoon salt, 1 1/2 sticks butter (6 ounces) and some water.

When you scoop flour into a cup, it can be compacted or loose, and your measurement inaccurate. For consistency I use a digital scale (10 oz = 2 cups flour). An added benefit is that weighing speeds the process (no fluffing the flour necessary)

Cut the butter into cubes. It should be frozen solid, so use your best chefs knife. If you find it too difficult to cut frozen butter, cut chilled butter into cubes and then freeze. Blending this dough with frozen butter is the key.

I use a food processor, which can, if overused, make the crust tough. Pulse the butter, flour and salt in the processor until the butter is the size of small peas. Pulse with quick bursts, not letting the machine run for more than a couple of seconds at a time.
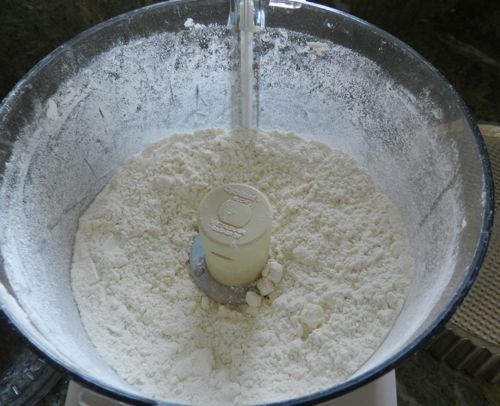
Pulse in just enough water (about 6 tablespoons) so that the dough becomes crumbly and barely holds together. I pulse and pour at the same time.
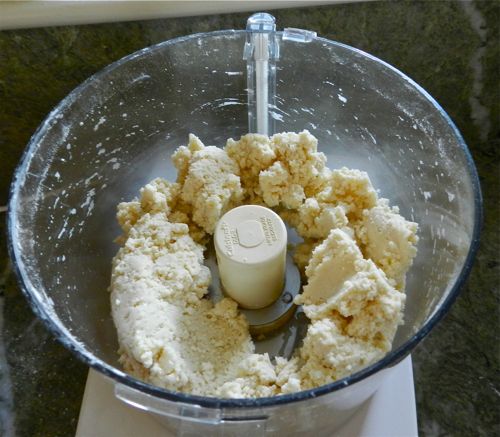
Many pie crust recipes recommend putting the dough in the refrigerator for a half-hour or more. I’ve found that the butter-filled dough becomes too hard to work. By using frozen butter, the dough is chilled but malleable and is ready to be rolled out right away.

Upend it onto a lightly floured counter. Shape into a flat circle with your hands. Use your palms. Avoid poking with your fingers or doing anything that makes the dough sticky. At this stage you want to add as little flour as possible.
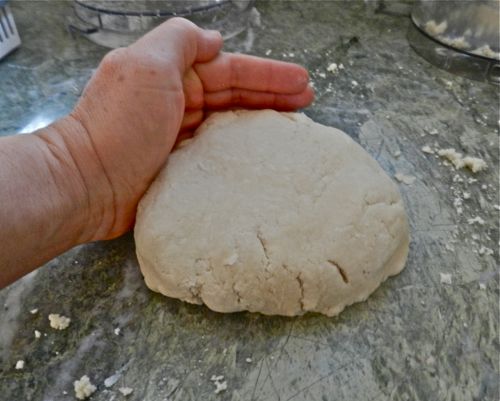
Divide this dough in half. Shape each into a circle. Refrigerate the half that you are not immediately working with.

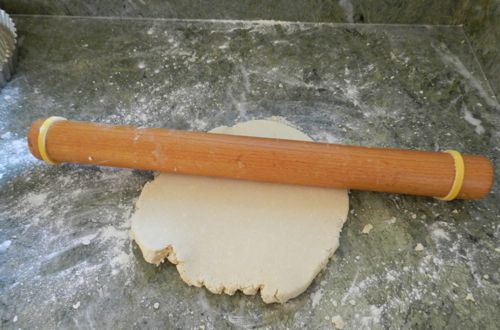
Lightly dust your work area with flour. Shape the dough into a flattened circle. The rolling pin you use can make all the difference in success. Use a long, even pin like the one pictured. My rolling pin has years of butter worked into the wood grain. It is almost nonstick. I put rubber rings on the ends. These help me to make each crust an exact 1/4-inch thick.

Start with your dough in a fat circle and end with a thin circle. To do this, roll from the center out, and after every pass with the rolling pin, pick up and move your dough a few degrees. Roll the pin away from you, never towards you. It’s an outward stroke. Lift the dough frequently, and it will not stick to the counter. Do not try to flatten the dough with brute strength, but instead, roll, roll, roll. If the top gets sticky, pick up the dough and turn it over so that the floured side is now towards the rolling pin. If you have to add flour to the work surface, use only a light dusting.
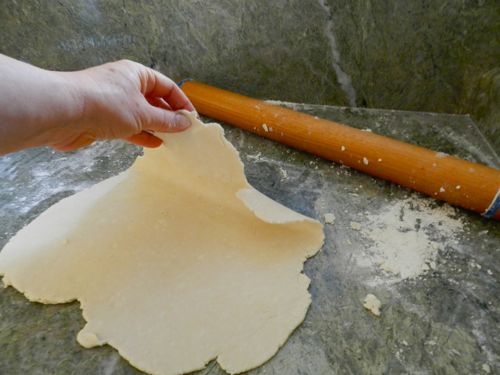
You will see bits of butter in the crust, but the whole should be smooth and pliable. At this point, the crust can be set into the pie plate.

But, for crusts that I freeze, I want them in perfect circles and so I use a large, 12-inch, tart pan as a cutter.
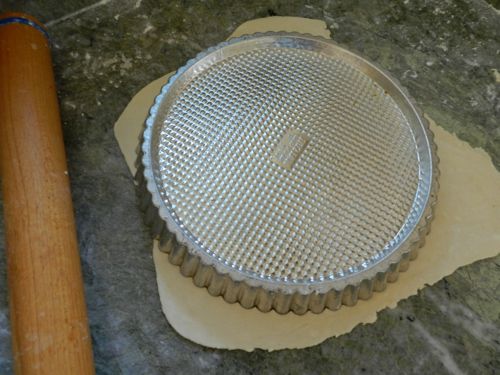
The bonus is that the edges are prettily fluted.
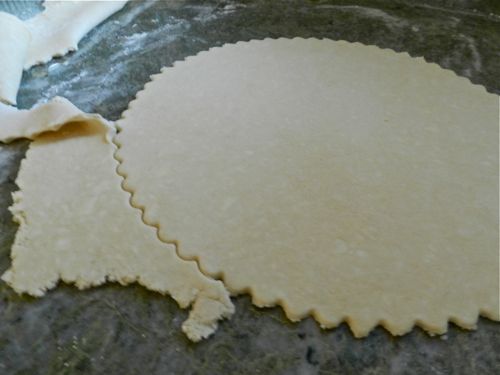
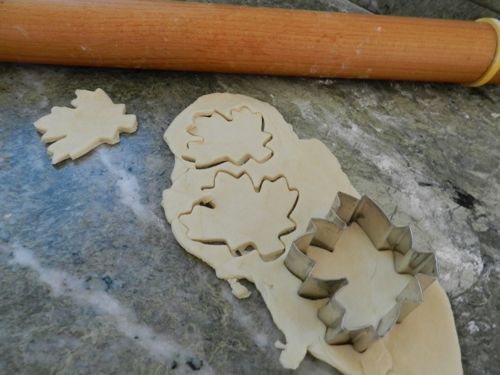
Don’t reuse the extra dough for another crust – a second rolling will make it overworked and tough. Instead, get out cookie cutters and use the pieces to decorate the pies, or turn them into cookies.
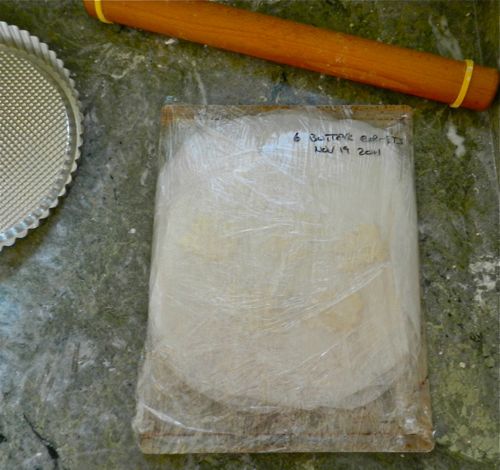
Wrapped well, butter crusts stored in a freezer will stay fresh for a half year. To freeze, place on a cookie sheet, with parchment paper circles between them.
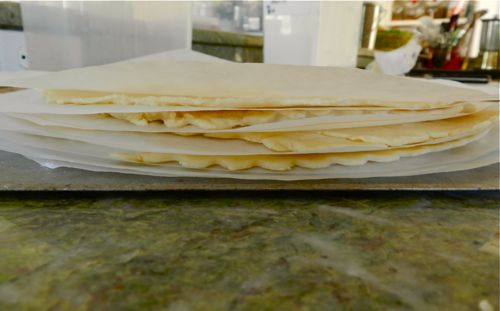
Then wrap tightly and label. To use frozen crusts, take one out of the wrapping and place on a pie plate. As it defrosts, it will sag into place. When it is just soft enough to press into the pan it is ready to use.
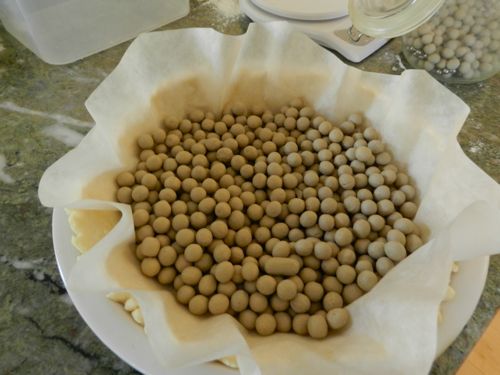
NOTE: To prebake a pie shell: Preheat the oven to 375ºF. Lay a piece of tin foil or parchment on the crust and then fill the pie with weights. If you don’t use weights, the center will bubble up and the sides will shrink down. I have ceramic weights designed for this task, but in a pinch you can use uncooked rice or beans. Bake for 12 minutes, remove the weights and foil and continue to bake. If you are filling the crust with pudding, then bake until thoroughly done and lightly brown. If the pie will be cooked further with the filling then bake until only slightly golden.
Making pie crusts is one of those cooking skills that you get better at each time you do it. I enjoy the seeing the transformation from such simple ingredients to a glossy crust. I like the feel of working with the dough. Embrace the process. Don’t expect perfection the first time (or two or three). But, do keep in mind that it’s hard to go wrong with butter and flour. If you make a mess, if you’ve overworked the dough, or added too much flour, roll it out anyway, toss on some grated cheese and make crackers (bake at 400ºF for 15 to 20 minutes). Have fun. Let me know how it goes.
Blueberry Clafoutis


DSCN4315

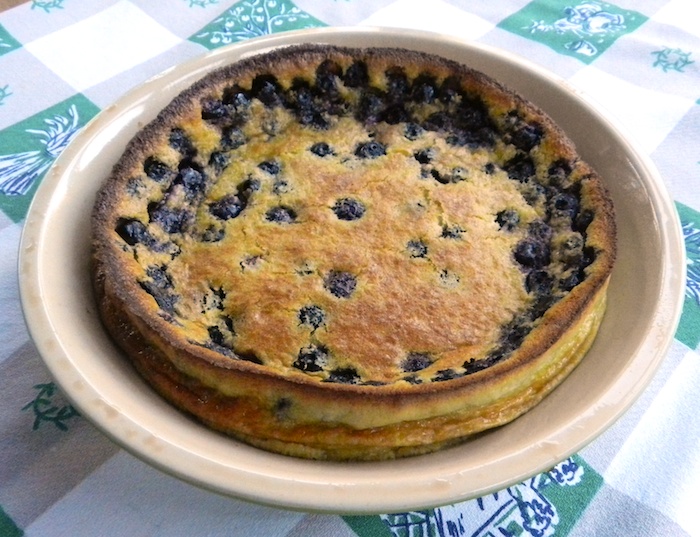
The classic French dessert, clafoutis, is not as popular as it should be here in the USA. It’s truly easy to make and absolutely delicious. It’s rather like a Dutch Baby Pancake, but thicker and dotted with fruit.

Blueberry Clafoutis

1 teaspoon sugar
3 large eggs (I used 4 pullet eggs)
1/3 cup organic turbinado raw cane sugar*
1/2 teaspoon vanilla extract (real, not imitation!)
1 1/3 cups milk
1/2 cup all-purpose flour
1/2 cup blueberries (fresh or frozen— don’t defrost)

1. Preheat the oven to 375 degrees F. Spray a 9-inch pie plate or baking dish with non-stick spray (or butter the dish.) Dust the bottom with the 1 teaspoon of sugar.
2. In a blender, puree the eggs, raw cane sugar, vanilla and milk. Note: I’ve used whole milk, lowfat milk, and skim milk combined with 1/3 cup cream. All variations set nicely.
*I specify the turbinado sugar for the subtle flavor. Regular sugar is sweeter and not as nuanced. Also, regular granulated sugar is finer which means you use more of it when measuring in dry cup measurers. You can use regular sugar, but reduce the amount by 2 tablespoons so that the clafoutis doesn’t turn out too sweet.)
3. Add the flour and puree until combined.
4. Put the blueberries into the baking dish and shake the pan to distribute evenly in one layer.
5. Pour the batter into the pie plate.
6. Bake for 35 minutes, or until the clafoutis puffs up and is set in the center. As it cools it collapses, but that doesn’t affect how good the leftovers are!

Makes 8 servings.

Clafoutis lend themselves to so many delicious variations. A classic is cherry. I make a apple version, in which the apples are sauteed in butter and brandy first. That recipe will be in my upcoming The Farmstead Egg Guide & Cookbook, coming in March of 2014.

Share on FacebookShare on Twitter+1Pin it on Pinterest

Coop Dimensions And Design Criteria

If you’re thinking about putting chickens your backyard, there’s a bewildering selection of prefab coops, building plans and advice out there. Unfortunately, many of the coops are poorly designed and are far too small for the number of birds that they advertise that they can house. There’s also been a plethora of “reinvented” coop ideas. I’m all for fun design, but not at the expense of the health of my hens.

Here’s what your laying hens really need:

Interior floor space: A minimum of 4 square feet per chicken of interior floor space. This doesn’t count the nesting boxes (some coops have them on the floor) or the exterior covered run space.

Interior air space: Chickens need to roost at least 30 inches up off of the ground, and have head space to do that comfortably.

Roosts: 6 inches per hen. I prefer rounded roosts. Hens have special ligaments in their legs that lock in place when they sleep. This is how they can sleep without falling off the perch. To do this, they need to be on a round roost. Roosts should be at least 18-inches off of the floor to allow the hens to breathe clean and dry air while sleeping. If possible, have roosts at varying heights because that helps with flock dynamics. A ladder-style roost is best, so that the heavy hens can hop up and down. There should be head room above the top run to allow for air flow.

Windows: Sunlight is essential in a coop. Hens have very poor night vision. Even if it’s daylight outside, if it’s dark in the coop, your chickens won’t get moving, eating, or laying their eggs if they can’t see to hop off of the roost. Also, sunshine is a natural sanitizer. And, the hens appreciate a sunny spot on a damp and cold day to sit in. Finally, windows allow you to look in, and sometimes you need to know what’s going on in the henhouse!

Ventilation: Soffits in the eaves are not enough. A cupola is best, as it very effectively pulls damp air up and out. Vents near the eaves are good, but must be large enough. Windows that open when it is hot are a necessity.

Pop door: This is the small door that the chickens use to go in and out. In cold weather, they can come and go, but the barn will remain cozy.

Nesting boxes: Plan on 2 or 3 for seven or fewer hens. For a large flock have 1 box for every 5 birds. These can be homemade or

. Mount these about about 6 inches off of the ground. If they’re higher than the roosts, then the hens will sleep in them  – something that you don’t want them to do.

Exterior space: Provide at least 8 square feet per bird for the fenced run.

Flooring: You can have anything from dirt to wood to concrete. If you do have a dirt floor, then make sure that you can protect your hens from digging predators and rats with underground fencing. If you have wood, you can add a sheet of inexpensive vinyl to keep it from absorbing moisture and to ease cleaning. I have concrete floors in my coops, which is an initial expense, but makes for secure and clean housing.

You’ll also need an area for dust bathing, and a sheltered place, whether inside or out, for the food and water dispensers. You’ll need storage for grain, bedding and tools. I prefer coops and runs that I can walk into for ease of cleaning and also so that I can spend time with my chickens. Don’t be swayed by the ads that tout small starter coops. Buying one will be an expensive mistake, as you’ll need replace it later on. Design and build the right housing from the start and you’ll have a healthy, peaceful, productive flock.

2013-03-06@08.48.26

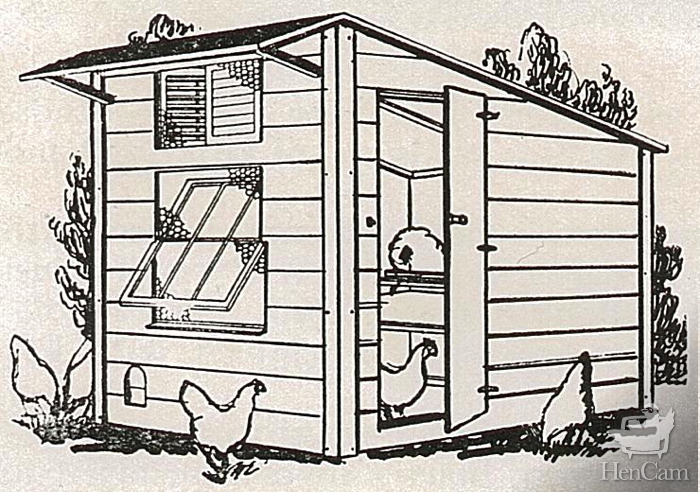
6 x 8 foot design from a 1930 catalog

If you’re looking for ideas, I have a Pinterest board with examples of small coop designs.