Chick Care

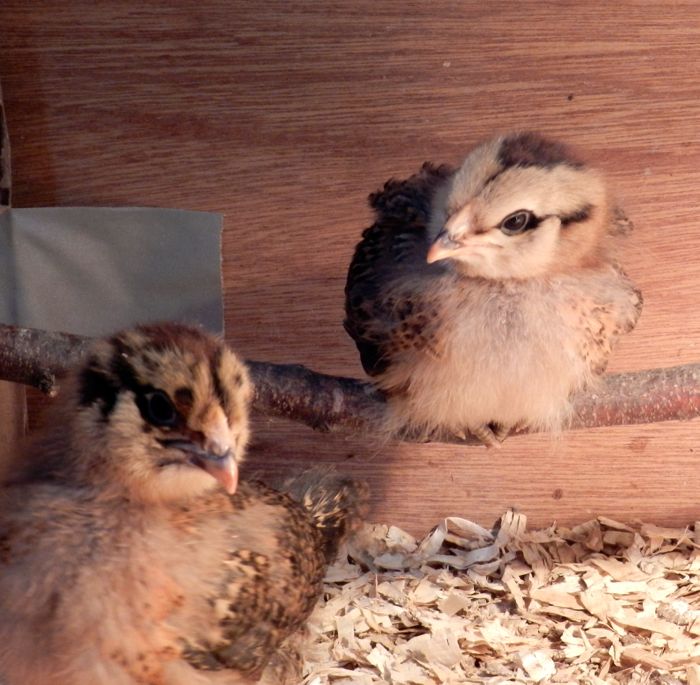
Those tiny, peeping chicks that you bring home from the feed store or post office are ridiculously adorable and are obviously babies. They will require special care for the first four months of their lives. Have their housing ready for them. It’s likely that they’ve traveled to get to you, and they’ll need water, food and heat as soon as they arrive home. Chicks need to stay warm; their fluffy coats don’t insulate them like their adult feathers will, and so they have to live in a brooder, which will keep them safe and the right temperature as they mature.

chick

As cute as they are, do not be tempted to keep the chicks in your kitchen, or for that matter, anywhere in your house. First of all, they grow rapidly, and they will soon be too big for whatever box you thought would be adequate. Secondly, and most important, is that chicks make a mess. They poop – a lot – and they scratch their manure into a fine dust. That mixes with the sticky keratin that they shed as they lose their down and unfurl feathers. All of that will coat every surface in your house, and you’ll be breathing it in. So, plan ahead and have a place in the barn, the coop, the garage, or your basement, but not in your own living areas. While on this topic – don’t kiss the chicks. Poultry naturally carry bacteria, including salmonella, in their guts. You’ll stay safe if you wash your hands after handling your birds. You run a risk of getting seriously ill if you put your mouth to their bodies. I’ve written more about chickens and human diseases here. For more about handling chicks, read this.

Chicks have a few basic requirements. They need to stay warm. They need food and water. They need to be able to scratch the ground with their feet. They need enough space so that they aren’t stressed. I also firmly believe that a major factor in raising healthy hens from chicks is usually overlooked. Chicks are curious, busy, and social beings. A typical brooder, which is basically a heat lamp, bedding, food and water is too boring for them. The very first week that they arrive, I set up an enriched environment. I give them interesting things to do so that pecking each other doesn’t become a pastime. I’ll get into that later in this article.

The Brooder

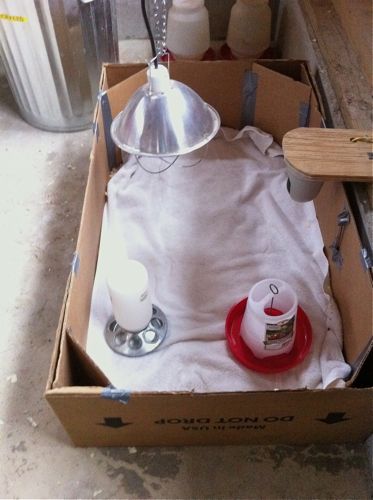
I’ve found that the easiest way to construct a brooder is to get a big cardboard carton, like one that a washing machine comes in. Or, you can tape together sturdy packing boxes. The thick high sides will keep out drafts. A hanging heat lamp provides warmth. Because chicks have a crowd mentality, and because even those fluffy sweet-looking babies peck and chase, block off the corners so that no one gets trapped and pounded on or smothered.

brooder


This is inexpensive, temporary housing.


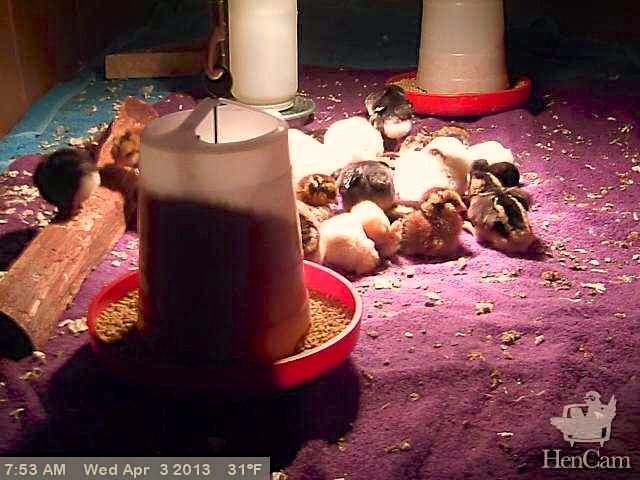
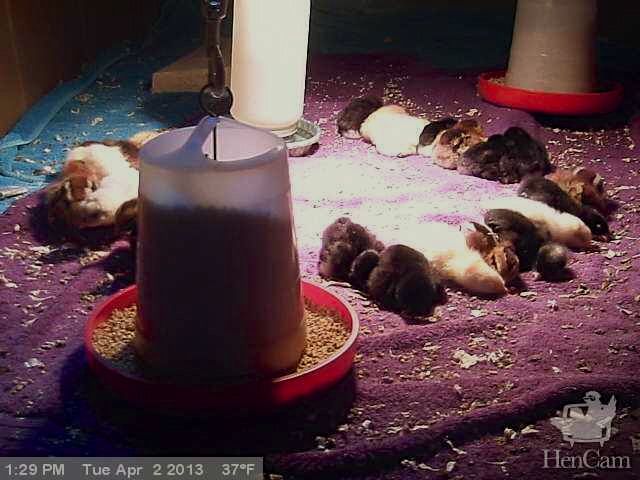
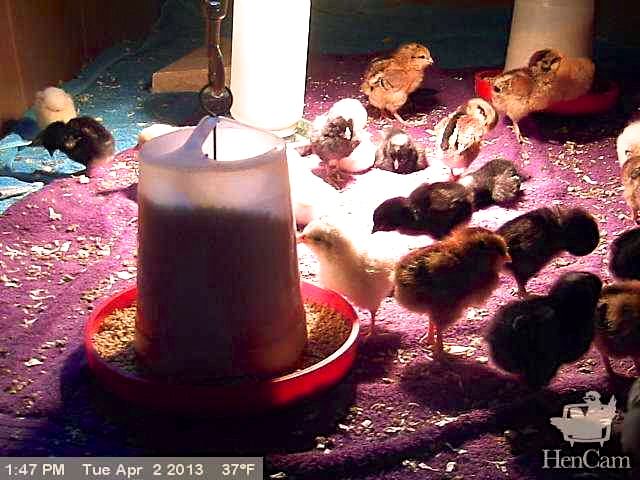
When the chicks arrive, keeping them warm is key. The temperature should be 95º F. But, I don’t use a thermometer. The chicks tell me if they’re comfortable. The heat lamp is on a cord that can be raised to regulate the temperature. Notice that the brooder is big enough that the chicks can get away from the heat if they want to. If they’re peeping loudly and crowded under the heat lamp, then they’re cold.

huddled


If they’re in the shadows, away from the light, they’re too hot.

kumbaya


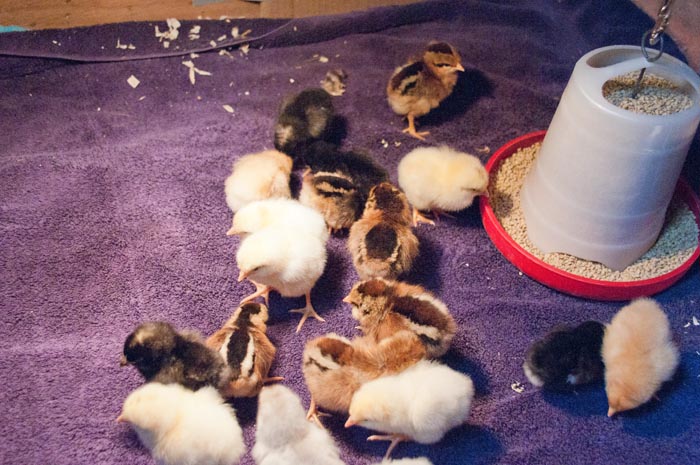
If they’re evenly spaced, and either active or dozing here and there, then it’s just right.

evenly-spaced

Every few days they require a few degrees less warmth, and so I raise up the lamp. Because my chicks are kept in an outbuilding that isn’t heated, I adjust the lamp during the day as the outside temperature fluctuates. This is a basic heat lamp. One of these days I’ll try the new

. But this one works, and so I haven’t felt the need to spend the money.


Feeding Chicks

When chicks hatch, they still have some yolk remaining inside of them. This provides them with nutrients and water for the first few days of life, which is why chicks can be shipped in boxes through the mail. As soon as they arrive home they need to be fed and watered. Gently hold each chick and dip her beak in the water. If she gets a bit on her beak, she’ll swallow and that’s all it takes to teach her where the water is. Use a

 designed for chicks, as the little ones can drown in a dish.

The bulk of a chick’s diet should come from commercial feed formulated specifically for them. Chick feed differs from laying hen ration in several important ways. First of all, it is in the form of crumbles, which, being smaller, is easier for chicks to peck and swallow. Secondly, chick feed is higher in protein, around 18% versus 14 to 16% in laying hen pellets. Lastly, and of the greatest importance, chick feed is low in calcium. Mature birds eat laying hen pellets formulated with calcium because that mineral is necessary to create eggs. What’s good for layers is not good for chicks. Chicks fed a ration with calcium will develop kidney disease. Chick feed comes plain or medicated. Although chicks in large production facilities are often fed sub-therapeautic antibiotics, the bags of feed sold to backyard keepers don’t have those drugs in them. Rather, the “medication” refers to a drug that kills a lethal protozoa called coccidia. Not all backyards harbor coccidia, but if yours does, the chicks might get bloody diarrhea and die. Some people wait until there is a sign of the ailment before treating the flock with a coccidiostat. Other chicken keepers routinely offer a medicated ration as a preventative measure. Some, like myself, get chicks vaccinated for coccidia. If your chicks are vaccinated for coccidia, then you cannot use medicated feed. (This is for the coccidia vaccine. If your chicks are vaccinated only for Marek’s disease, you can feed a coccidiostat.)

It’s best to provide the crumbles in a dispenser made for this purpose. If possible, use a

. This keeps the chicks from standing and pooping in their ration.

SEG6527


Feed your young birds a starter ration until they reach point of lay, about sixteen to eighteen weeks of age. At that point they will do better on a lower protein ration, and their systems can handle the calcium. Do not feed chicks that are destined to be laying hens a “finish ration” or a “show and grow.” These products are designed for meat birds, and put weight on fast. Not only is the protein and fat content wrong for layers, but a few companies do put antibiotics into them.

Keeping Chicks Busy

Within a day of hatching, a chick is ready to search for food, to explore, and to interact with others. Unfortunately, a typical brooder is a boring place. There’s nothing to peck at except for uninteresting crumbles and the other chicks. In a perfect world, the chicks would be able to go outside and scratch up bugs in the dirt, eat greens in the yard, and try little bits of this and that. But, the weather often doesn’t cooperate. Chicks will grow okay if fed only crumbles. But, from the get go they’re omnivores, and a varied diet will do them good. That doesn’t mean that you should give them piles of treats. Chicks are designed to eat continuously, and they are gluttons! Give them an easy to chow down on food and they’ll overeat; depending on what you feed, it could be like letting a toddler eat only Lucky Charms cereal.

You might have read that you can chop up vegetables and bread into fine bits and feed it as treats to your chicks. I disagree. Chicks don’t need their treats minced. By day four a chick can swallow a whole worm with no problem (and digest it easily thanks to grit.) I want the treats that I feed my chicks to take time and effort to consume. Also, the treats must be nutritious. Chicks require a higher protein content than adult hens. Bread and corn won’t provide that. On the other hand, don’t feed dried mealworms, as a few too many can lead to kidney disease.

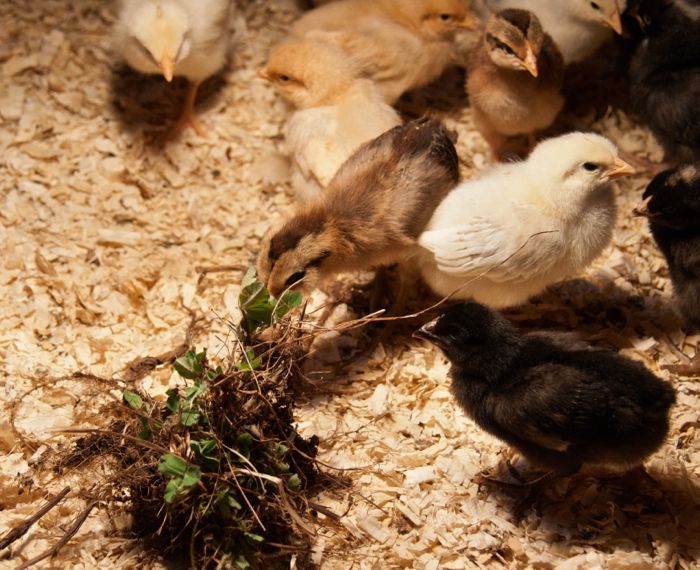
The first week I give the chicks a small clod of dirt with a clump of clover or dandelion attached.

week-old-chicks

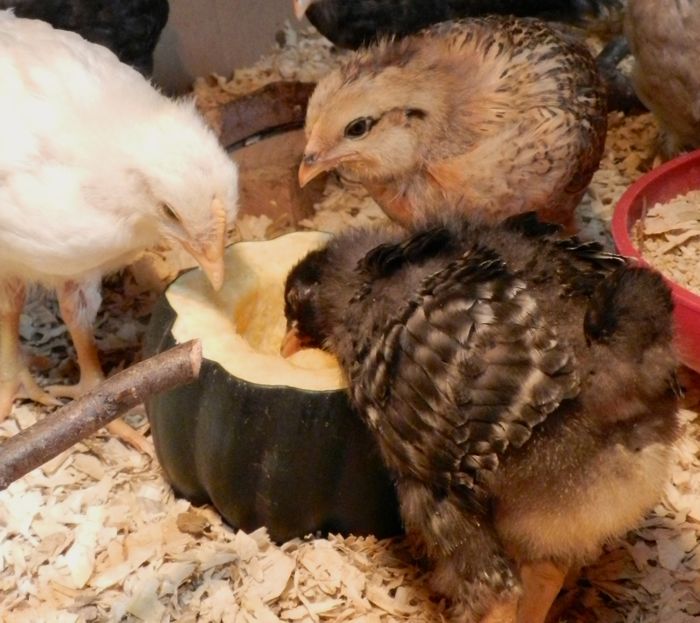
This is better than grass, which has long blades that can get impacted in the crop. The chicks peck and eat bits of green and they even find bugs to eat. You might see a chase and tug of war when a worm has been found. They’ll scratch at the dirt. Scratching is another innate behavior that chicks are preprogrammed to do. Giving them an outlet for this is important to their well-being. You’ll hear much excited and happy chirping. If nothing is growing, or just for a change, give them a vegetable to work at. They’ll peck at it and not at each other. Win-win!

acorn-squash


As the chicks get older, you can give them a clod with short blades of grass attached. An added benefit is that once the greens and the bugs are eaten up, there will be dirt for them to take a dirt bath in. Your chicks will know how to do that their first week, too!

Grit and Probiotics

Along with providing food and water, there are two other things to offer your chicks that will greatly improve their vitality: grit and probiotics. Chickens, like all birds, do not have teeth. They don’t chew. Rather, they swallow food whole. Their digestive tracts are designed to deal with this. Specifically, a chicken has a gizzard, which is an exceptionally strong muscular pouch that grinds up food. The gizzard does this with the help of small rocks that the chicken swallows. Even if your hens free-range, it’s unlikely that they can find just the right pebbles for their gizzard. Certainly chicks, in a cleanly bedded brooder, don’t have access to what their gizzards need to function properly. That’s why they need you to provide grit.

You can buy a bag of grit at the feed store or online. Basically, it’s ground up granite.

 is finer than chicken grit. It might seem crazy to spend $10 on a bag of pebbles, but it is essential to the health of your new flock. This is not a new idea. I have a catalog from 1919 that offers bags of chick grit for sale. Give the chicks a couple of days to eat their crumbles before introducing grit. Then, set out a dispenser filled with the grit. The chicks know what they need and will eat the right amount. In their first two weeks, 26 chicks consumed all of the grit in this container!

grit-feeder


The other supplement that I provide my chicks are probiotics. Everyone’s intestinal tract has both good and bad bacteria in residence. When the balance is off animals don’t thrive and can sicken. You can provide your chicks with the right microorganisms by adding a product like

 to the drinking water. I do this for the first two weeks to give them a good start.

Roosts for Chicks

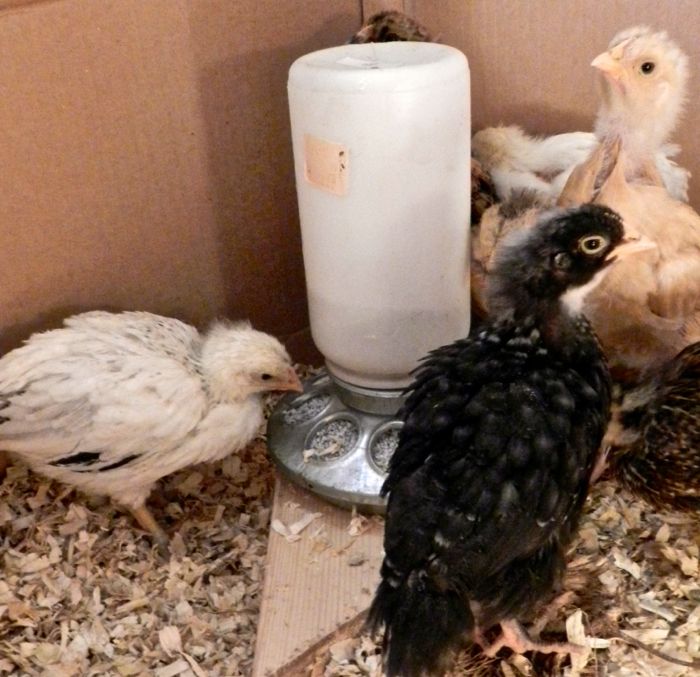
Vegetables and dirt clods will keep your chicks busy, but it won’t take care of all of their active energy. By the second week, chicks will be looking to perch. Provide them with small roosts. I make them out of branches nailed to 2 x 4 blocks. Soon you’ll see your chicks jumping up, finding friends to roost next to, and taking naps in their favorite spots. This primes them for good roosting behavior when they are adults.

2-week-roost


Cleaning the Brooder

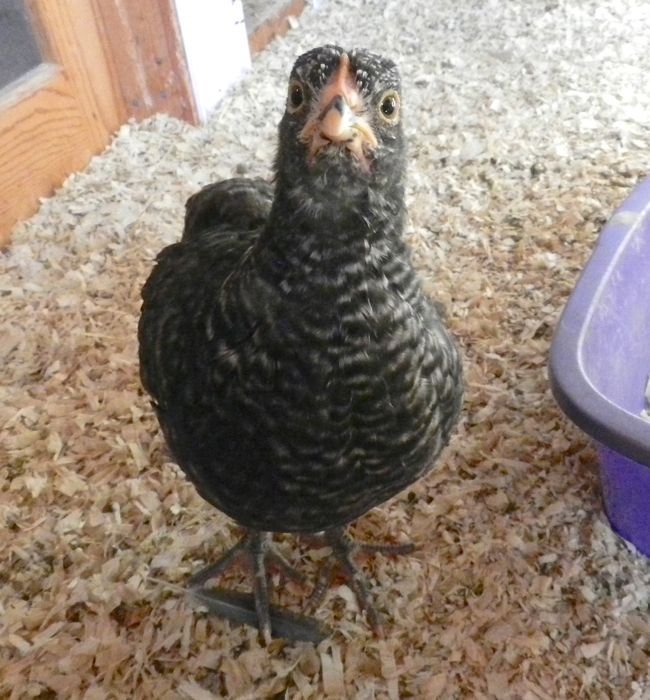
For the first day or two, the floor of the coop should be covered with a surface that is easy for the chicks to walk on and that they can’t eat. I use old towels. Newspaper is too slippery. Paper towels will do. Once the chicks know to eat the crumbles, switch to an absorbent bedding, like pine shavings.

maran

Keep the manure picked out as best you can (I use a kitty litter scoop) but soon enough, the chicks will have shredded it to a fine dust. Shovel it out and replace. Keeping the air fresh and clean is essential for your flock’s respiratory health.


Going Outside!

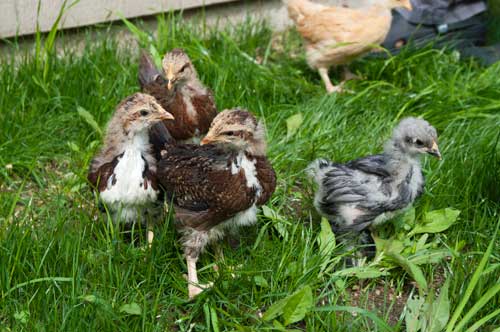
As long as the weather is warm and dry, your chicks can go outside for daytime playtime. Do keep an eye on them, as everyone from cats to hawks find chicks irresistible. Make sure that they have water and food. If it is sunny, have a spot of shade for them. One reason why I like to have the brooder inside of the coop is that the transition to going outside becomes seamless. By the time they’re two months old, they’re able to go in and out at will (into my safely fenced pen.)

DSC_74641


The Chicks Grow Fast

That fluff-ball stage lasts all of 4 days. In no time at all they lose their down and get long, hard outer feathers. They get tall and leggy, stretch their wings and legs and act like mini-pteryodactyls. So, while you’re enjoying the chicks, keep in mind that they soon need their adult housing. I’ve written a FAQ about the criteria for a good coop here. You’ll need that coop sooner than you think!

How Long Do Chickens Live?

The question how long do chickens live? is not one that anyone used to ask because poultry are rarely kept past their second year. As much as many of us love our chickens solely for their charm and character, it’s important to understand that historically their primary reason for being has been for food. Because meat birds are eaten when they are a few months old, and laying hens are most productive in their first two years, chickens have never been designed to last longer. Even in the past, on small farms, laying hens were harvested for the stew pot by the age of eighteen months. After that they’re barely worth turning into broth. From a farmer’s perspective, replenishing stock every year makes sense, but what does this mean for those of us who have chickens that become pets? We have issues that “real” farmers, even those who kept small homesteads in the 1800s, have never had to face.

In the first two years most losses will be due to infectious respiratory diseases. Hopefully, immediate treatment with antibiotics will enable many of your birds to survive. Two diseases too frequently seen are kidney failure and fatty liver disease. These, however, are preventable with proper feeding. Also in the first two years, hens will die from laying glitches. Making eggs is a complicated system and all does not always work smoothly. Internal laying and prolapse are two of the many issues that occur in flocks.

Hens that live into their third year and beyond lay fewer eggs each season. Their molts take longer, they forage less and they nap more. Your best layers will usually be the first to get sick and die. It takes a huge effort to make an egg day in and day out. The hens simply get worn out. When one part fails, everything does. As they age, hens develop a multitude of reproductive issues. Sometimes the tract becomes diseased, sometimes it breaks, and a piece of it solidifies and gets expelled. Sometimes the hen can no longer process calcium to make solid egg shells. The eggs break inside of her. Eventually, these issues cause death. Hens also get diseases which are serious and irreversible. Cancer and tumors are prevalent. Sometimes the digestive tract becomes diseased or impacted. I’ve had hens begin to starve because they could no longer digest food. (I’ve written extensively about the kindness of euthanizing hens. They don’t show suffering in a way you’re likely used to, and they’re not going to tell you when they’re done. You have to decide. This is the hard, yet unavoidable, part of backyard chicken keeping.)

It’s not always disease that gets your flock. Regardless of how carefully you protect your chickens, predators will find a way in. Suddenly, you lose  one hen, or all of them.

A hen that lives past the age of four might have a few more years – I’ve noticed that the ones that managed to live that long aren’t as prone to ailments. By seven she has truly defied the odds. In my own flock, I’ve had hens live to be nine. It’s rare, but it happens, that a hen will live for a dozen years.

It’s crucial that a person who is thinking about keeping a few chickens in their backyard takes into account that a hen can live for years after she is no longer productive. If there are zoning restrictions on flock size, what will you do when your hens are too old to lay? Some people chose to cull at two years when feeding the chicken costs more than the value of the eggs that she lays. Other will keep the old hens on as pets. If that’s the decision, then it’s also important to understand that hens get sick, that veterinary help is hard to find, and that when it is it available it’s prohibitively expensive and rarely effective. Sick hens often suffer for weeks before they die, as owners do not know how to make the final decision about euthanasia. Anyone who keeps chickens will face making very difficult end of life decisions.

Despite the ailments and lack of eggs, by the time one of my hens stops laying, she’s become part of the fabric of my backyard community. I do what I can to keep the old chickens around. It’s good to see my old friends doddering about the yard. As long as my old hens eat with vigor and cast a curious eye to the world, I know that they have more time. I’m committed to giving the older chickens a good quality of life until the end. But, I always keep in mind that long life is not the standard, and that it is okay when a hen has lived only a couple of years. Death is part of keeping chickens.

Buffy at age 6


The Molt

The molt is a part of the chicken’s lifecycle. Once a year a hen drops her old feathers and replaces them with new ones. The first time a chicken molts will be somewhere around 18 months of age, so most first-time chicken keepers are surprised when their glossy, full-feathered hens suddenly have bare spots and stop laying. For new chicken keepers, the reaction is often panic. Surely, a scruffy, grumpy, non-laying hen can’t be normal! Even those of us with many years of experience put the molt out of mind, until one day we walk into the coop and seem to be wading through feathers.

The onset of the molt signals the end of the laying season. Molting hens stop laying because they need to put all of their energy into growing feathers. Then, by the time they’re back in full plumage, it’s winter when there’s less light, and it’s cold, and so they continue their break from laying until spring. Here in New England, egg production slows in late August and resumes again in February. Despite the molt, there’s always a hen or two who lays right through the molt, and some hens molt quickly and resume laying with barely a break. The eggs from those hens will be precious!

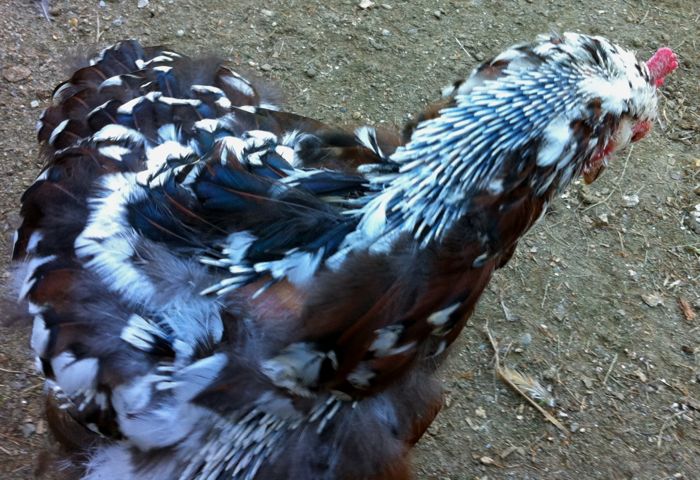
Molting is a messy, lengthy, disruptive event. Each chicken has about 8,500 feathers. Some birds will lose all of them, seemingly at once. It’s as if the hen is a cartoon character that sneezes and then finds herself embarrassingly naked. More often than not, it’s a patchy affair, with some bald spots and other areas looking raggedy. A few chickens never look scraggly and you can tell that they’re molting only by the evidence of their feathers on the ground. Like the leaves falling in autumn, the a flock doesn’t molt at the same time or pace. It can take a several months for everyone to lose their feathers and during that time the coop will look as if there’s been a pillow fight overnight. Every night.

Although books will tell you that all molts progress from neck to back, wing to tail, your own hens will likely be the exception to the rule. Lulu, who did everything more dramatically than the other hens, lost her tail feathers first, until all were gone but two. She looked like she was wearing one of those costume Indian headdresses that used to be sold at five and dime stores. That lasted for a couple of days, then more feathers dropped until she looked like a discarded, worn-out child’s toy. New feathers first appear as pointed quills. When Lulu’s feathers were growing back in, she looked like a crazed porcupine.

Some chickens don’t molt until it’s truly cold out, and their owners worry that they’ll literally freeze their butts off. This is not a cause for concern. There’s no need to hang a heat lamp in the barn. Somehow they’ll stay warm.

Your poorest layers will be the first to molt, and their molts will take the longest. In days past the birds that molted in the summer were the ones that went into the soup pot as only the best layers were kept through the winter. I take note of who molts first, but my hens get to stay around, grow new feathers and enjoy a break from laying. As much as I miss the eggs, it’s good for the hens to have a few months for renewal. For me, it’s a reminder that my hens are not egg laying machines, and that even a basic commodity like an egg is a product of a complex animal, linked to the cycles of the natural world.

Molting chickens act differently; they often become subdued and less active. Molting is probably uncomfortable and tiring for them. Again, there’s no need to worry – they’ll perk up when the molt ends.

Feathers are almost pure protein, so it’s good to add extra nutrients to the diet during the molt. In days past, farmers added bone and bits of meat. These were ground on site, and you can find antique tools for this task on eBay and at flea markets. Meat attracts vermin and predators, so if you do feed it, provide only as much as the chickens can eat up quickly. Also, bacteria and diseases can be transmitted through meat, so only use only that of good quality. Some people add dry cat kibble to their hens’ rations. Since most commercial pet food is made from meat of questionable sourcing, it’s not something that I do.

Bugs are a great source of protein, so if you allow your hens into the fallow fall garden, they’ll clean up pests hiding in the old vegetation and at the same time get the additional nutrition that they need. Hens limited to a small run can be fed any one of a variety of store-bought products. You can buy freeze-dried mealworms, (sold at at various stores packaged for different animals – pet lizards, wild birds, and chickens – but it’s all the same product.) They’re 50% protein and the hens love them, but too many can trigger kidney failure. A teaspoon a day per hen is plenty! Besides, mealworms are very pricey. Hulled sunflower seeds are an excellent source of protein and essential fats, but again, too many can cause kidney failure.  Another option is to purchase a supplement formulated for molting pet birds, like canaries. These products are high in protein and the other nutrients needed for feather growth. I gave some daily to Lulu when she was molting, and her feathers grew back beautifully, glossy and thick. Feed stores stock supplements made for chickens. Calf-manna is a brand that’s been around for decades. They make a 

 that looks like laying hen pellets, but it’s obviously “manna’ by the distinctive anise aroma. They say that the spice helps palatability. When I fed it to my flock, they certainly liked it and came through the molt with beautiful new plumage.

If your hen molts out of season, it could be due to stress. A hen kept from food (from bullying or an ailment) will molt. In fact, factory egg producers use that knowledge to implement an inhumane practice. The CAFOs hate molting, it’s not predictable, uniform or productive, and so they starve their birds so that they’ll all molt at one time. Since starvation has been outlawed in some countries, there are companies working to develop chemicals that will initiate and control the molt. Just thinking about that makes me more tolerant of my hens’ cycles.

As far as what to do with all of those feathers… I save the longest and prettiest ones for dried flower arrangements. Some I give to children during school visits. The feathers make good cat toys, too. All of the rest go into the compost.

Bumblefoot

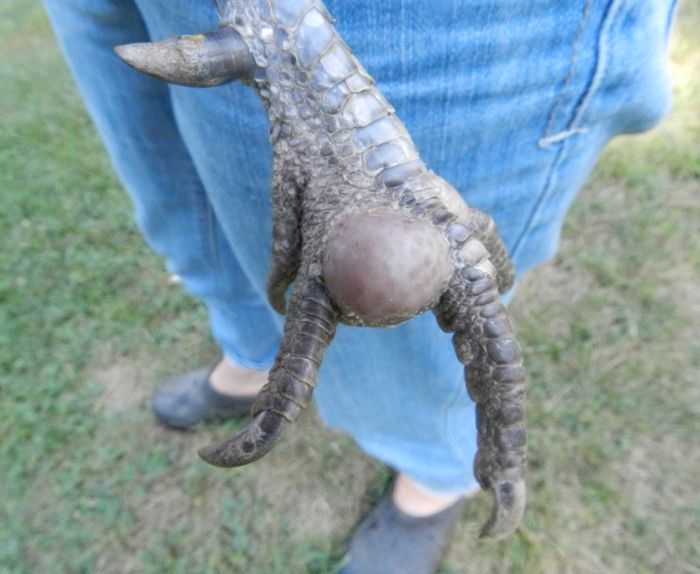
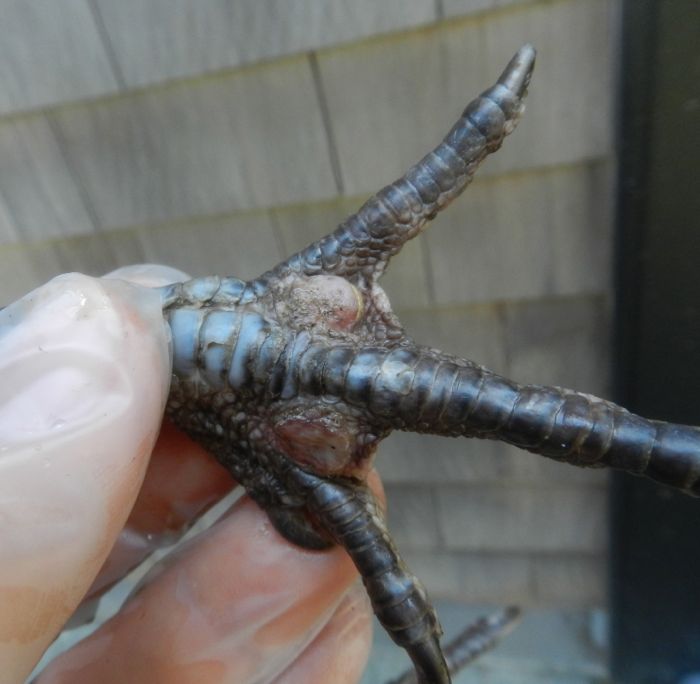
After almost two decades of chicken keeping, I finally had a case of bumblefoot in my flock. Sometimes bumblefoot is due to getting a splinter or a cut in the bottom of the foot. Typically, bumblefoot occurs when a heavy hen injures herself jumping off of a roost. All of this leads to a infection inside the pad of the foot which results in severe swelling and pain. If the injury isn’t attended to, the infection can spread up the leg and kill the bird.

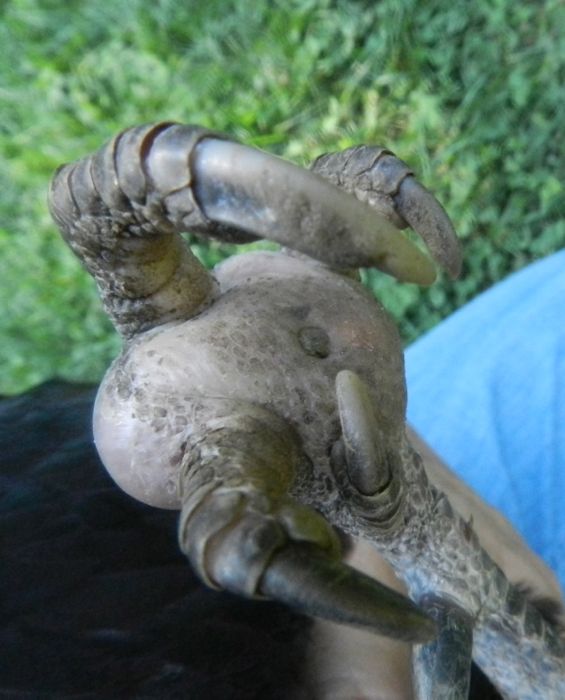
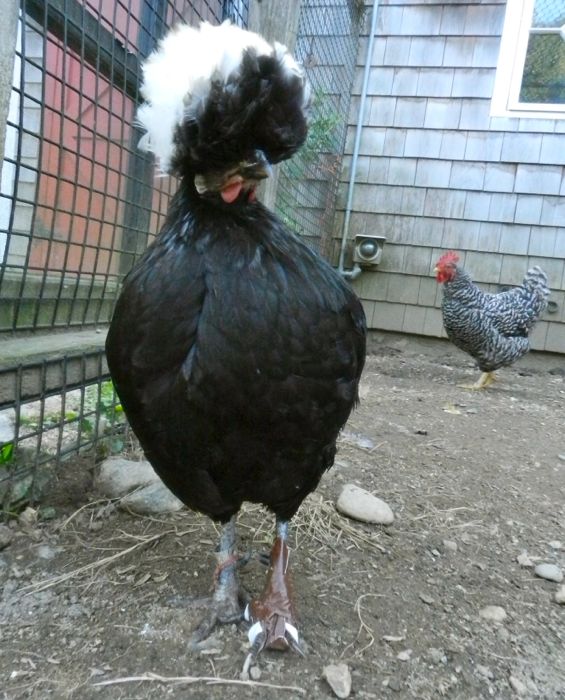
Of course, it wasn’t one of my heavy and older hens that got bumblefoot. It was lithe and skinny Tina, which shows that there’s always an exception to the rule. She wasn’t limping too badly, but the swelling was hard to miss.

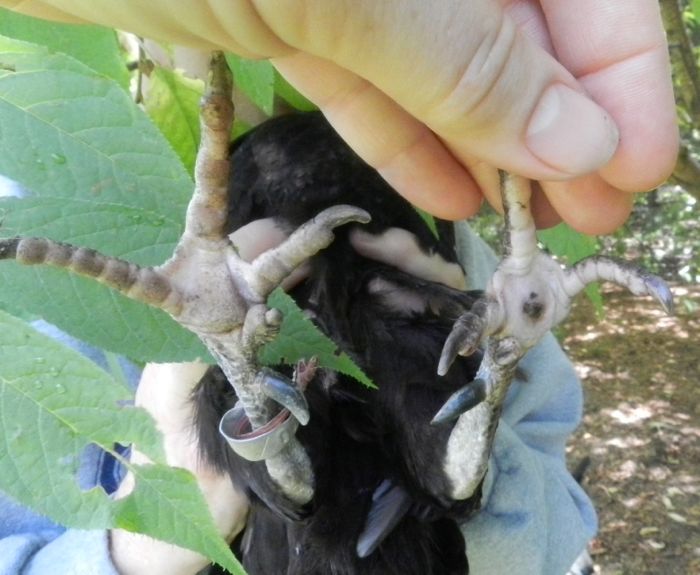
Inspection of the underside showed a scab, or plug.

A trip the vet would have cost several hundred dollars, which in all honesty, I am not willing to spend on Tina. Besides, the travel and anesthesia would have been stressful for her. I decided to take care of this on my own. I got out my chicken medicine kit. I pulled on some disposable gloves – the infective agent is usually a staphylococci bacterium, something that, if accidentally ingested, could do me harm.

No one was home, so I had to do this one-handed. (Which also limited the ability to take photos during the operation!)

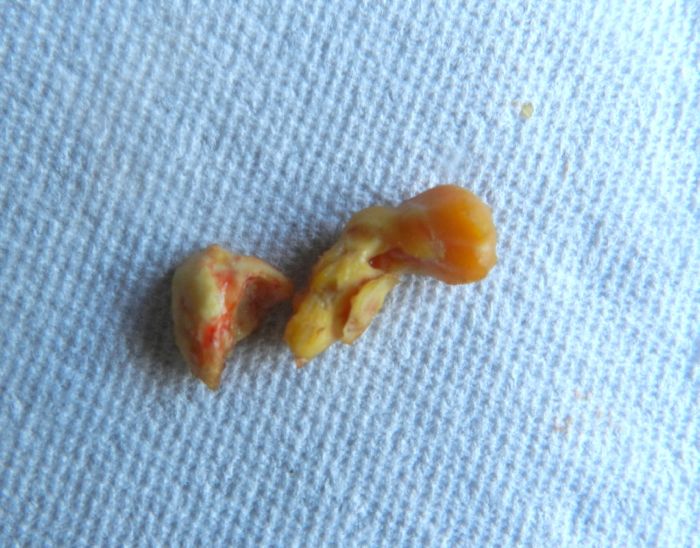
I held Tina in one arm, snug against me, holding the foot with my left hand. In my right hand I wielded sharp tweezers. Wit a bit of twisting and digging, I pulled off the plug. I was surprised that only a trickle of gunky liquid oozed out. I squeezed. Nothing.  I inserted the tweezers into the now open hole and felt around. Meanwhile, Tina was more annoyed at being held than at what I was doing to her foot. She only squawked once during this entire operation. The tweezers found a hard solid mass which I grabbed with the sharp tips and pulled out. It was a lump the size, shape and hardness of a peanut. With more probing and poking, I pulled out a second one. My guess is that these are a combination of infected fluids and tissue that solidified, rather like a pearl in an oyster.

I rinsed out the foot with running water. I generously squirted a broad spectrum antibiotic ointment (purchased from the vet for an injury some time ago), into the hole. I covered the pad with a strip of clean bandage, and held it all on with duct tape. I used dark brown duct tape – the silver encourages pecking. I put Tina back into the pen with the other hens. After a couple of funny struts and a peek at her bandaged foot, she walked off, looking as normal as Tina ever looks. That evening she roosted with the others.

I changed her bandage the next day, and although there was still some swelling,

the foot looked deflated. I bandaged her up again, and even with cotton and duct tape attached, Tina walked without hesitation or limp.

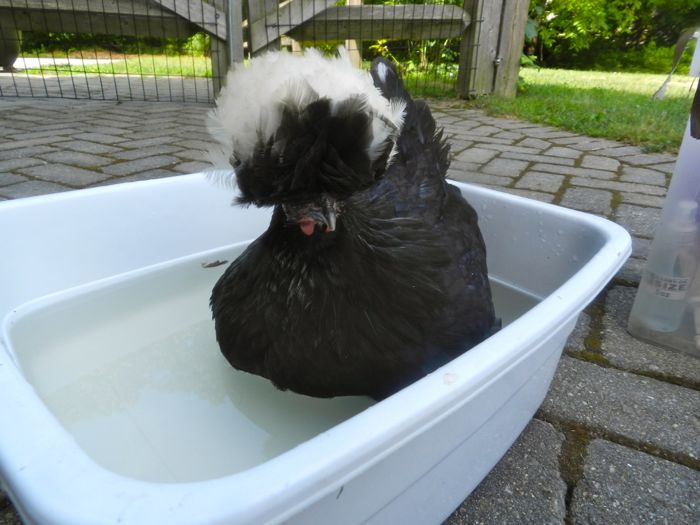
Two days later I removed the bandage and soaked Tina’s foot in a warm epsom salt bath. (I used a half-cup of epsom salts in the tub.) I did this to draw out any remaining infection and to deep clean the foot. It was easiest to soak Tina, too, and she seemed to like it. She settled right in.

There was still some swelling in her foot, and the hole was open so I poked around with the tweezers, but didn’t find anything nasty inside.

I squirted in some more antibiotic ointment and bandaged her once more. That bandage fell off two days later and upon inspection, the foot pad appeared healed. I let it be.

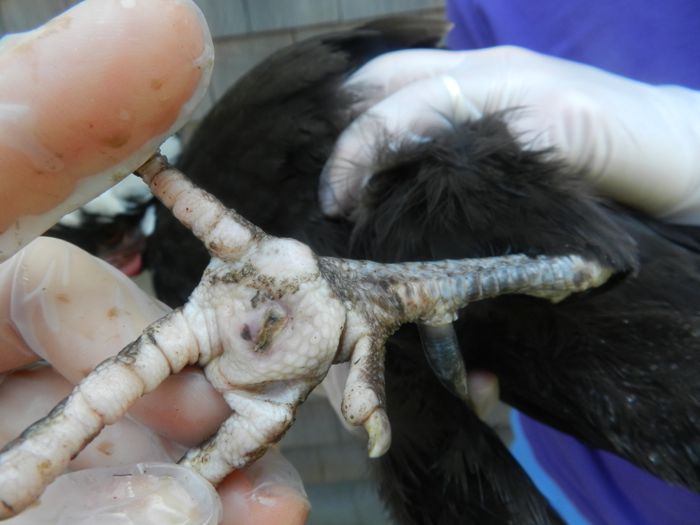
A week later the foot seems healthy again. Compare it to the other foot. There’s nothing pretty about chicken feet, especially on older hen’s dirty, scaly, lumpy feet. But, having seen this foot ballooned up with infection, it looks darn good now.

I’ve talked with others who have more experience than I with bumblefoot. Some chickens get recurring infections. Some, despite surgery, never recover. I hope that I don’t see a case for another two decades. But if I do, I hope I’ll be as successful treating it as I was this time around.

Yuck! My Hens Have Messy Bottoms!

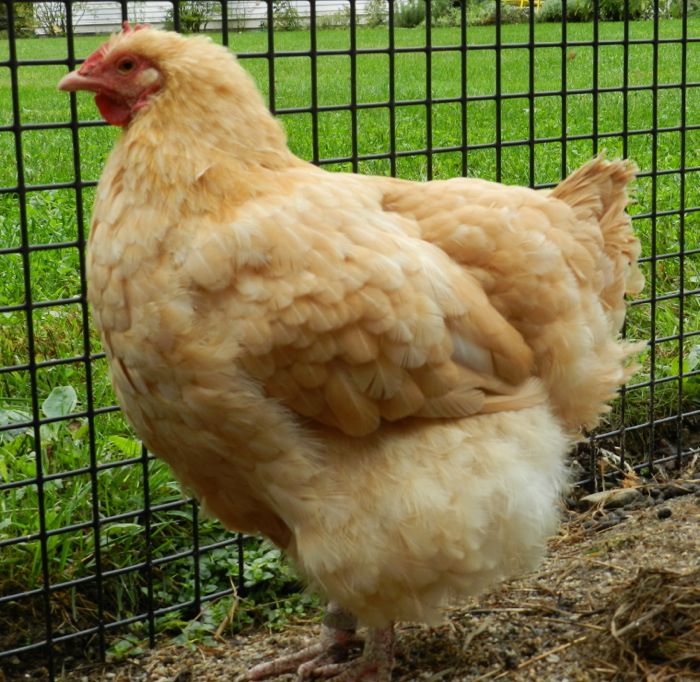
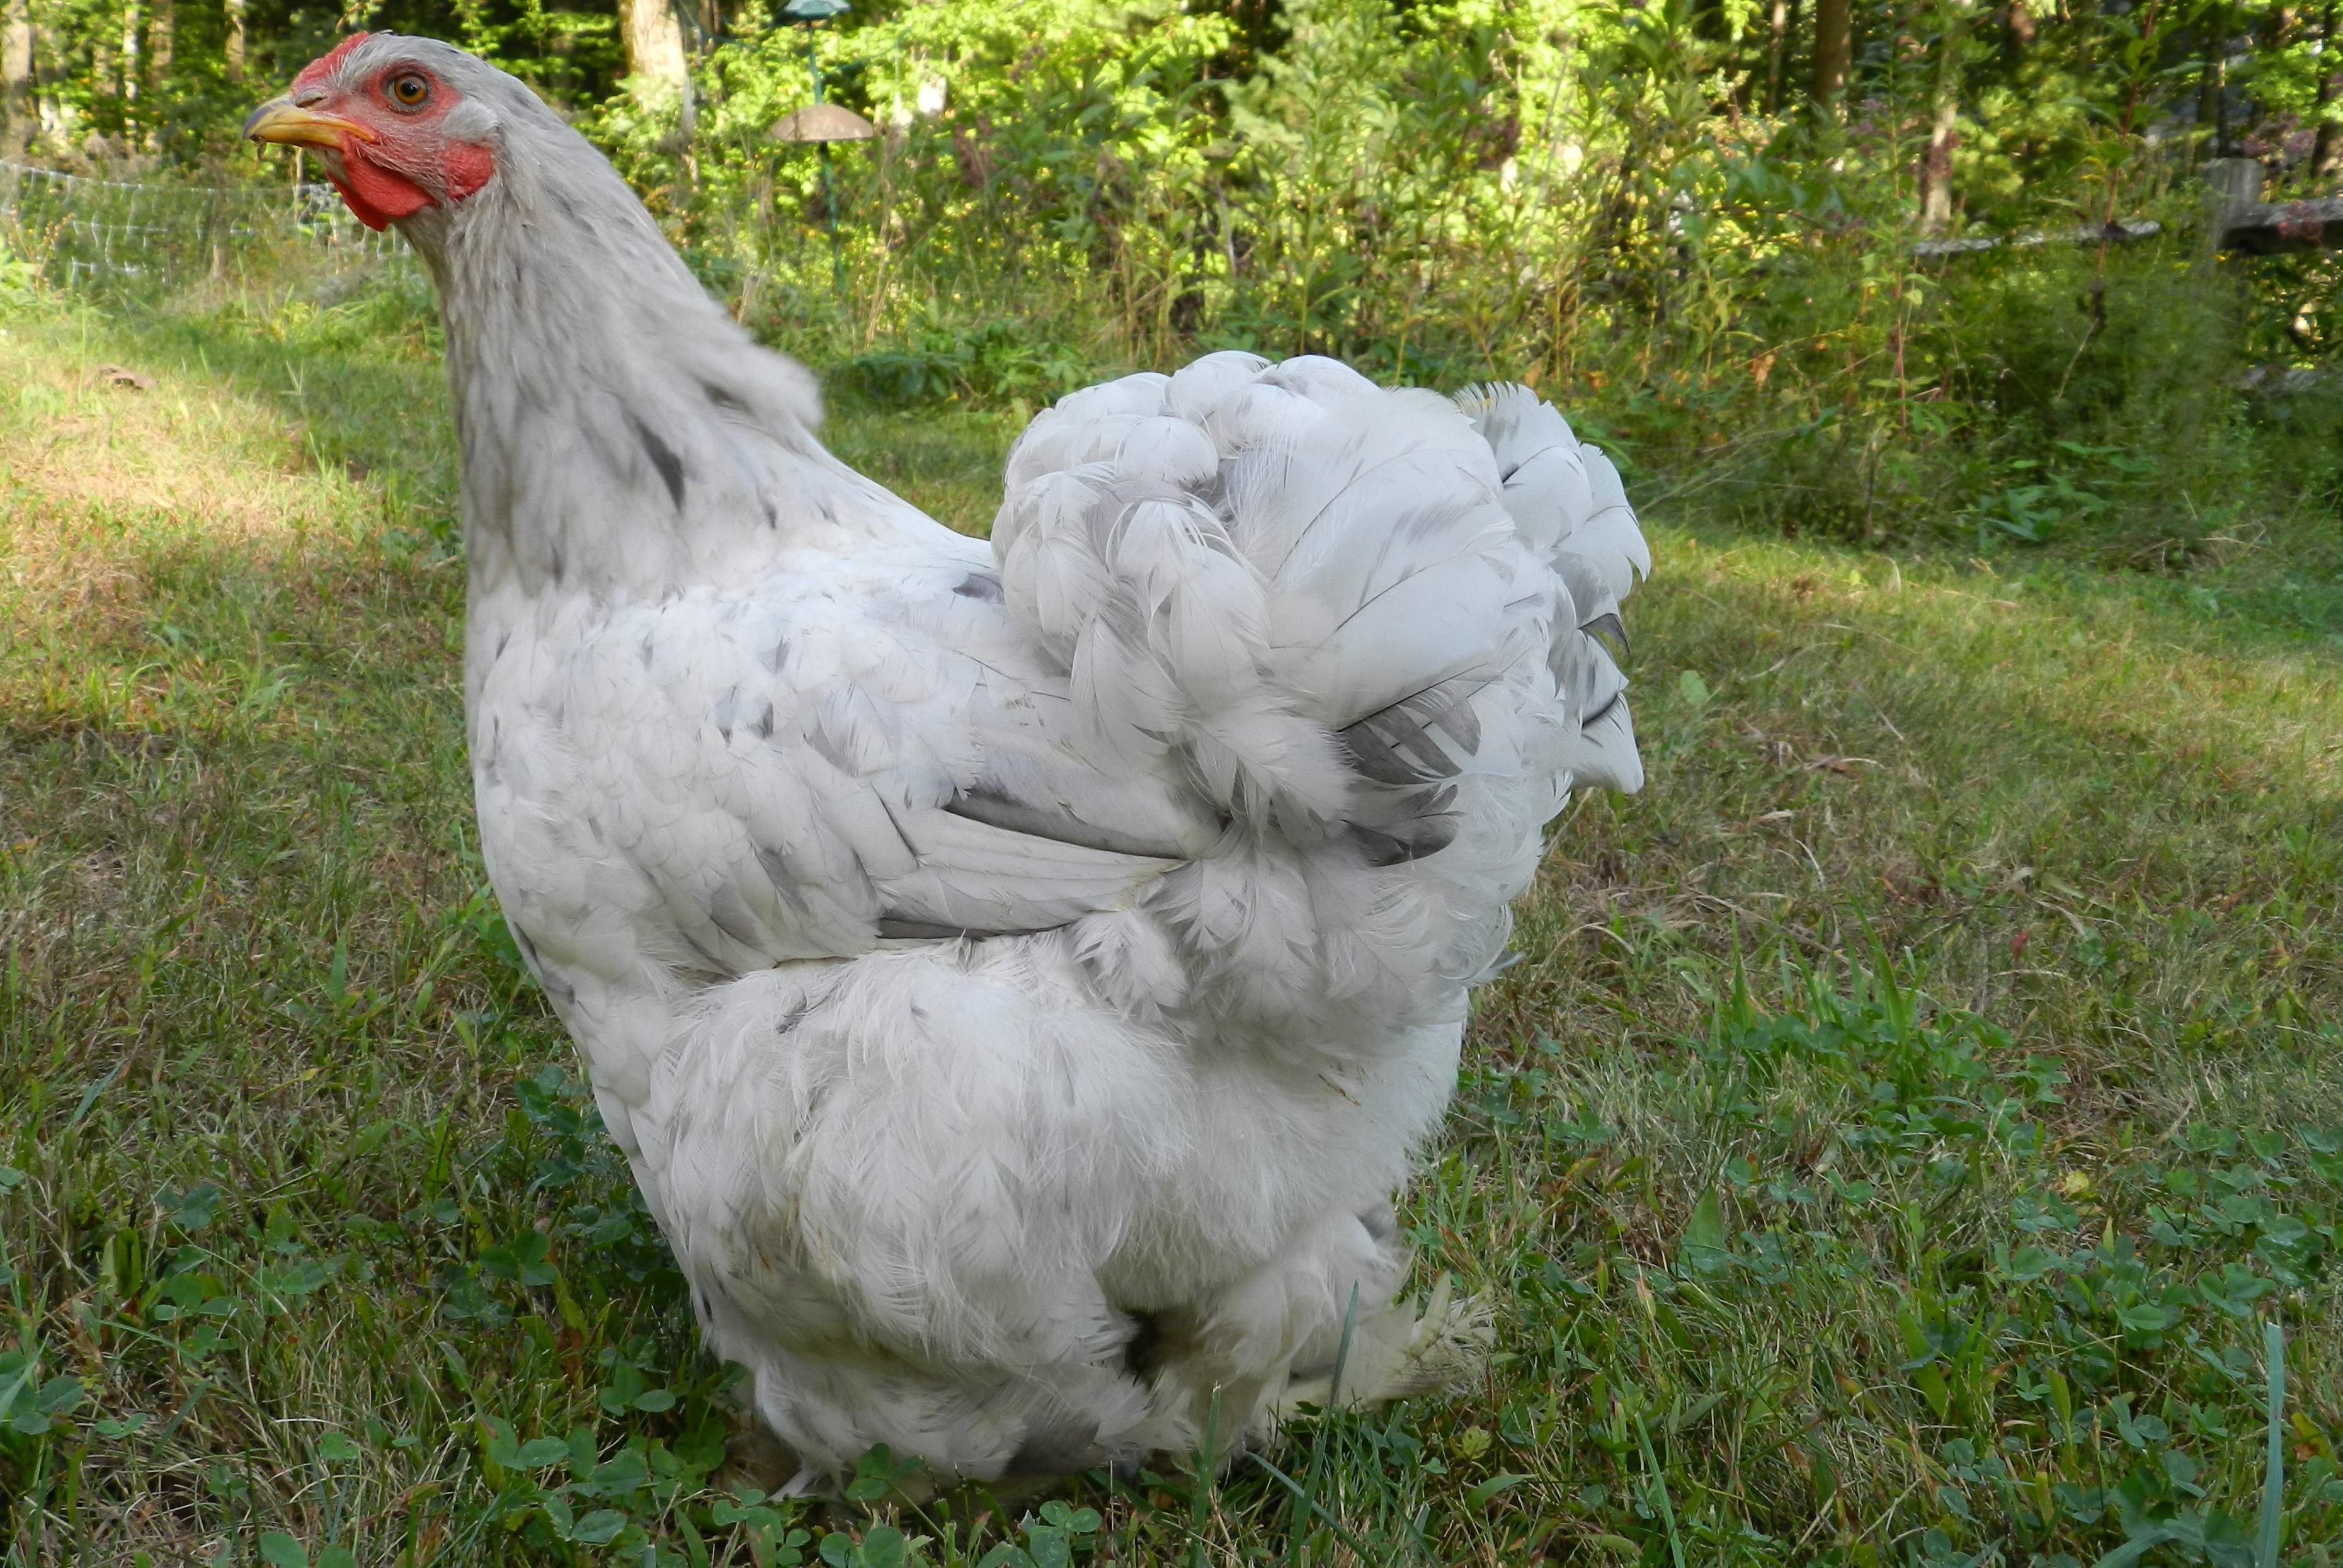
One of the reasons that people choose to have chickens is that they are so decorative. Feathers shimmer in a range of hues. Their fluffy-feathered bottoms are both charming and comical. Some breeds are sleek, and some, like my cochin, Pearl, look like fussy Victorian ladies.


What we don’t picture, when we get chickens for the first time, is all of unpleasant stuff that comes out of their backsides. Chickens poop. A lot. Some of it gets stuck on their feathers, especially if the manure is at all runny.

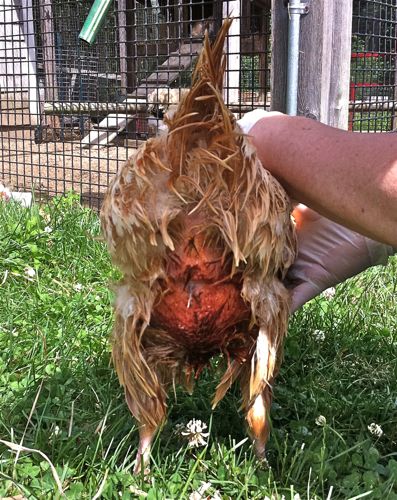
Diarrhea is often the first sign that your hen is sick. However, not all hens with messy bums are ill! Sometimes there’s nothing medically wrong with the chicken, and those clods of manure attached to her feathered bottom simply got stuck and dried on before reaching the ground. Don’t worry. It will eventually fall off. If it’s a real mess you can give your hen a bath. But it’s not necessary.

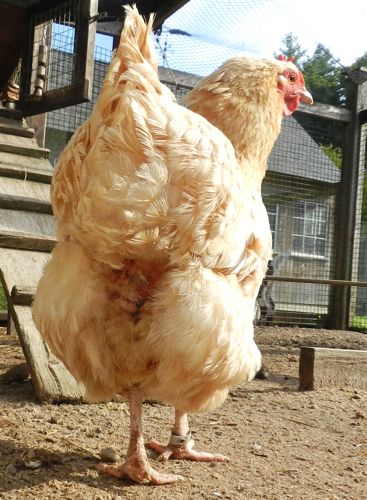
Then again, some hens have a continuous stream of smelly, thin, runny poo stuck to their feathers. This is often a sign of vent gleet, which is a yeast infection. Vent gleet can be an ongoing problem. Buffy arrived with this ailment and over the years I’ve treated it, and kept it in check, but it never fully disappears. To give a hen with vent gleet some relief, clean give her an epsom salt bath (follow the directions here.) If you’re lucky it will clear up for good. Some hens, though, like Buffy, have persistent cases. I’ve had Buffy for six years and her fluffy Orpington vent feathers have always been yucky. She’s not a hen that I pick up much!

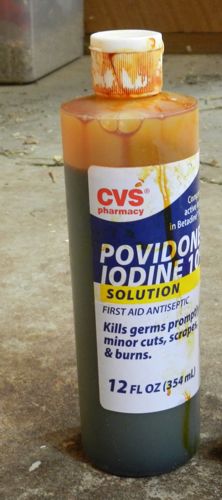
Some hens get mysterious skin ailments. A couple of years ago, Eleanor developed a hot, thick, red skin rash around her vent. Epsom salt baths seemed to make her comfortable but the symptoms didn’t go away. For hens like Eleanor and Buffy, there’s one additional tool in my medicine kit and that’s povidone. Povidone is similar to iodine, but is a stronger, broader spectrum bactericide. (It’s more expensive than bactrine, but worth it.)


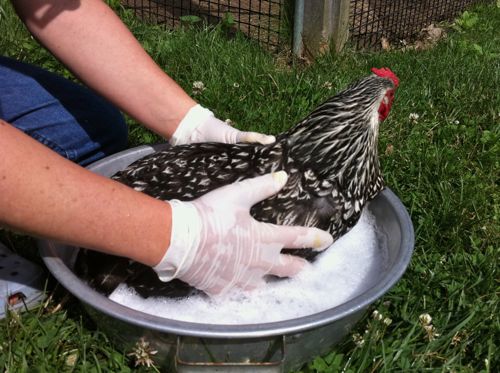
For the full treatment, first bathe the hen. Since you will be cleaning the feathers of caked-on manure, it’s not a bad idea to wear disposable gloves. After bathing, do a thorough rinsing off with clean water. If it’s a hot day, you can hold her under a hose. Here is Maizie getting bathed.


Once the hen is cleaned up, squirt the providone on the bare skin near the vent and rub it in. Use gloves and don’t wear clothes you care about. This stuff stains!


This is Buffy’s bum several weeks after treatment. Still no runny, stinky secretions!

Messy bums aren’t the only unsightly butt issue. Sometimes there’s feather loss. That’s covered in a separate FAQ!

Lastly, if your hen has serious diarrhea (not the thin stream like vent gleet, but copious, off-color and liquid) then it could be a sign of a serious underlying disease, like cancer or an infection. If that’s the case, you’ll see other symptoms, like lethargy and discomfort, and sadly the external help mentioned here won’t help.